In the intrepid spirit of trying new things for the heck of it, this post will take you behind-the-scenes as we build the portrait of a lightsaber-wielding fiend.
To make this picture, I enlisted the help of a model, who from this point on will be identified with the terrifying moniker of “Darth Jason”.
For the edit, I’m working in GIMP because my version of Photoshop is on a different computer. GIMP is a wonderful program to use if you don’t have money and if you have a lot of patience. Luckily I fulfil both criteria.
Authenticity is key
For Darth Jason’s costume, we opted for the “relaxed” dark side look.
The t-shirt and jeans combo is something a Sith warrior might choose to kick back in after a tiring day of stalking through alleyways in long and impractical robes.
Remember: authenticity is key.
High-tech weaponry
One of the first challenges you will inevitably face when preparing your picture is the fact that lightsabers don’t actually exist.
So we took a quick look around and found the next best thing:
A whisk.

Watch your back, Darth Vader
The key here was to make sure the whisksaber didn’t go across any part of Darth Jason’s body in the picture. That would have made things complicated in post-processing.
As long as we keep the whisk up against the black background, removing it during editing will be a three second job.
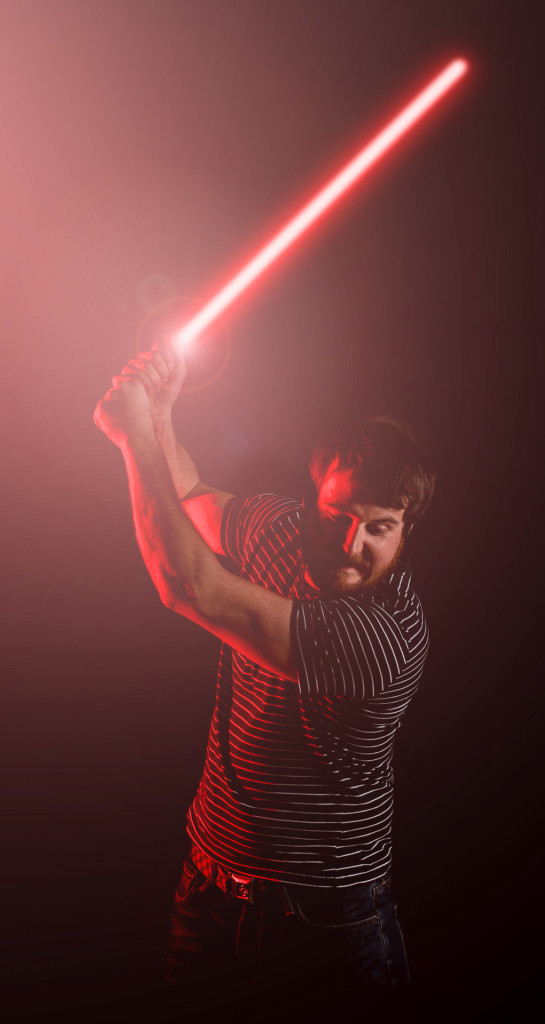
The scary red glow
The lighting here is a simple two strobe setup:
On the right side we have a flash fired into a white umbrella. This throws soft light over the scene and lights up Darth Jason nicely against the background.
The flash coming in from the left is unmodified, giving harder and harsher light. The flash is covered with a simple bright red filter, giving the appearance that the lightsaber is casting a sharp light all along the side of Darth Jason.
Here’s your all-access look behind-the-scenes:
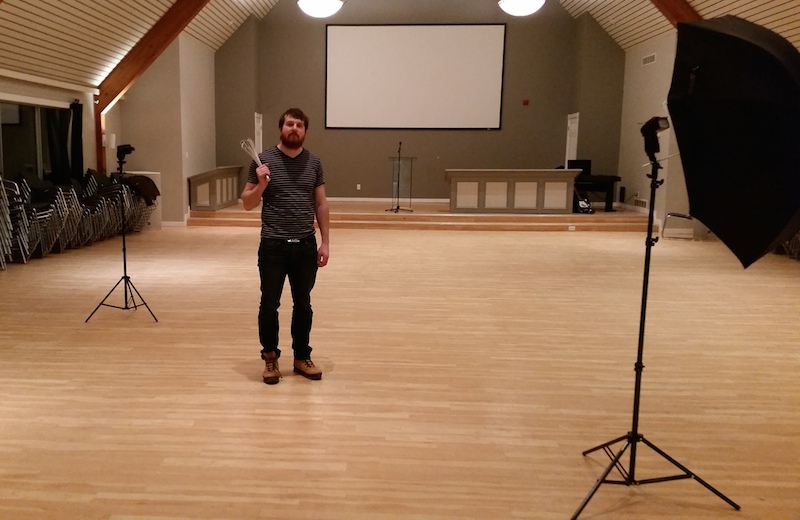
Yes, there was that much light in the room during the pictures. By dialing in settings of 1/250, ISO 100 and f8, the camera could only “see” black, despite the lighting.
With this setup, the only light in the scene would be what my flashes lit up. I also had to control the spill of the lighting so as to not accidentally light up the walls in the background.
“Beating an ewok over the head”
The task of striking an intimidating pose while holding a whisk isn’t an enviable one.
Getting a feeling of action into the scene was key for this picture. I believe that the basic inspiration for this picture was picture was:
“Pretend you’re beating an ewok over the head with your whisksaber”.
If that sounds remorseless, just remember that he’s on the dark side.
The Initial Edit
After getting the file onto the computer, the first step was to bump the exposure significantly. The original shot was very dark – as I recall it was the first shot we did after switching to the umbrella, so my lighting ratios weren’t tuned yet. But thanks to the power of RAW, I can easily bring the picture back from the dead.
A quick way to make sure the background fell into total darkness was to push up the blacks slider way down. This also accentuated the shadows, which is a good thing when you’re photographing dark lords and all that.
I also nudged the clarity slider up quite a bit to make Darth Jason more gritty and vivid.
Now here comes the fun part…
Making a Lightsaber in GIMP
There are a billion tutorials online to help with learning or perfecting a new technique. A simple Google search for “How to make a lightsaber picture” reveals hundreds of options.
Be warned: Some of them are crap. I would like to have said that more kindly, but I didn’t. Some are crap.
Take a bit of time to filter through the crap and find a tutorial that genuinely produces good results.
For my picture, I used this one as a starting point:
In this tutorial, the lightsaber is created by several stacked lines, with each modified with varying amount of gaussian blur. The tutorial is simple and easy to follow.
That said, there were three big drawbacks to this tutorial:
- The amount of gaussian blur needed depends on the size of the picture. Their image has a resolution of 640 x 430. My image was nearly 10x that. This means the amount of modification needed to get a similar looking blur needs higher. It would have been nice if they had addressed that point.
- After building the lightsaber, the “core” of it looked lifeless. I adjusted for this by layering several solid white versions of the line over top, then playing with the opacity until it blended in to give the appearance of a solid (and dangerous) light sword.
- The “finished” lightsaber lacked any environmental presence. It looks fancy, but it didn’t incorporate itself into the scene. So that brings us to our next subtitle…
Making it look real
Here’s the part that far too many lightsaber tutorials ignore:
If you follow the basic steps, you something that looks like a glowing sword, but with no ambience.
GIMP has a limited but useful collection of light effects tools to help with this in the Filters -> Light and Shadows menu option.
For my final image, I’ve layered a general light cloud (created using the “Light Effects” filter), as well as a burst effect (“Supernova” filter) and a lens flare (the aptly named “Lens Flare” filter) located right at the bottom of the lightsaber.
To get this right, the process is sheer trial and error. Techniques that work well in one picture don’t always look so nice in another.
Side Rant: One of the potential flaws of tutorials is that the step-by-step approach can kill improvisation. If your picture seems to be lacking something, improvise the heck out of it.
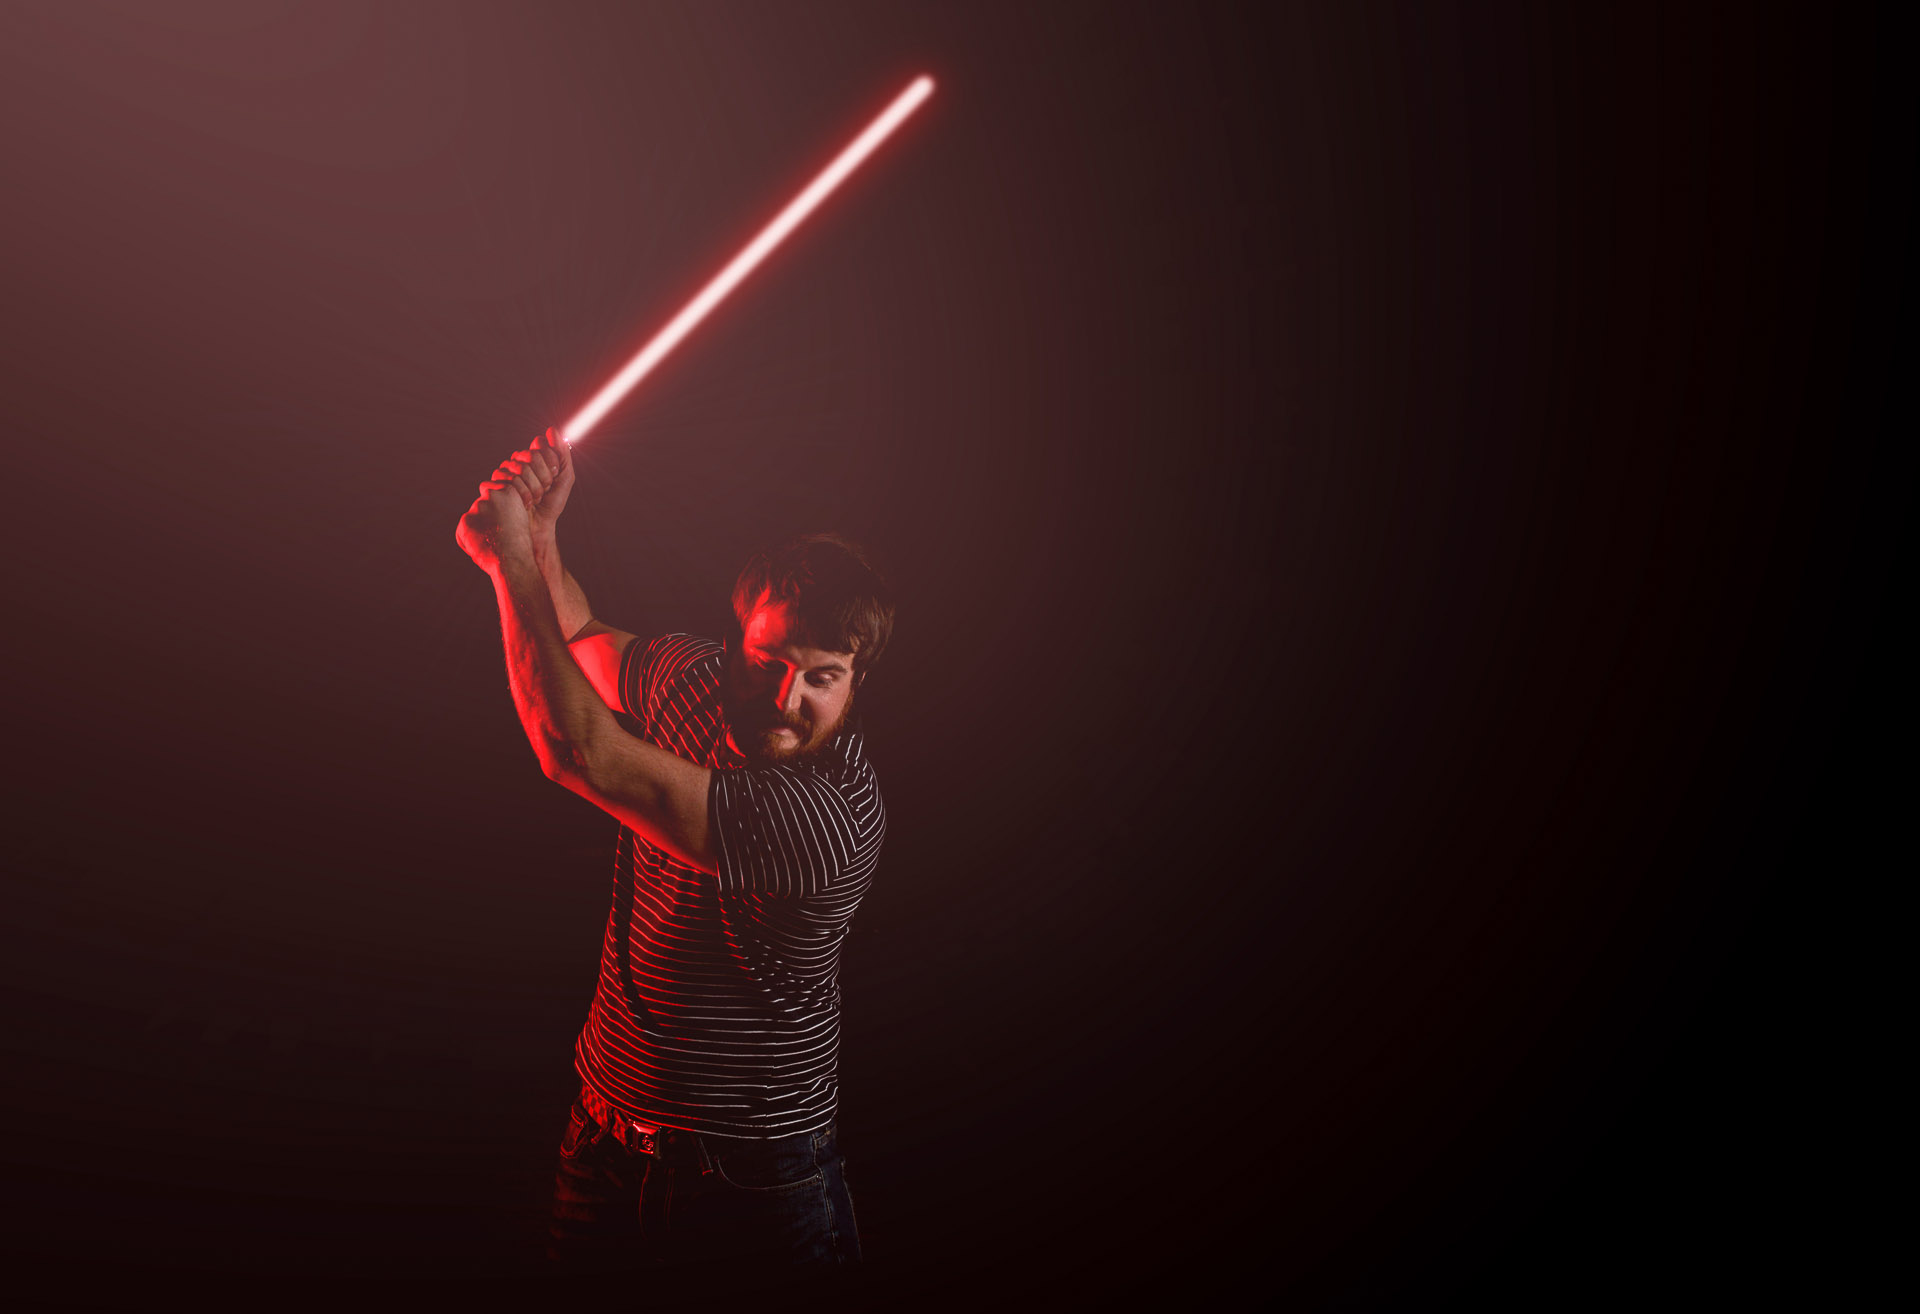
So that’s it! Here’s our final image:
So, what could be improved?
You’ve probably noticed that there’s no handle on the lightsaber.
Well, yeah. There isn’t one. Sue me.
It certainly would have been an option to pull a high-quality image from the internet and photoshop it in, but at this point I was tired and wanted to sleep.
And I’ve been told my whole life that sleep is important.
So there you have it – the concept to creation process behind a portrait with a lightsaber.
Come join the plaid side of the force