How to take a dramatic hockey portrait
No Results Found
The page you requested could not be found. Try refining your search, or use the navigation above to locate the post.
Most shots require a high ISO, resulting in face-melting quality loss. (If you disagree with the severity of this statement, trying shooting at ISO 3200 on a Canon Rebel T1i then get back to me)
But for this shot, we got the chance to slow things down a bit.
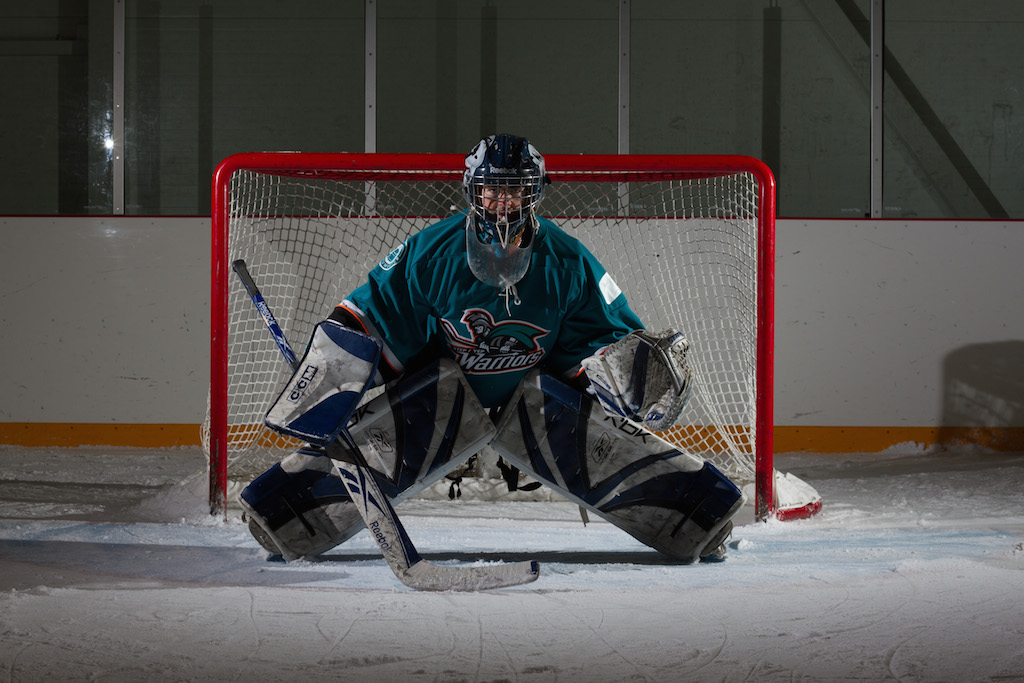
Full disclosure, this is a self-portrait. Well, sort of.
That means that I’m the goalie in the picture and I set the shot up, but it was a very reliable friend who pulled the trigger.
This was also fairly late in the evening, so we didn’t have time to get things completely perfect, but I’m still satisfied with the results.
Here’s what we’re going to talk about in this article:
Building the Shot
The first challenge to deal with was reflections. Hockey arenas are lined with plexiglass, which instantly limited options for lighting placement. Sure, a front-on lighting setup could work with some time devoted to Photoshopping out the reflection. But why create work when there are other, better options?
A typical athlete portrait lighting setup has two lights coming in from either side of the subject. More lights can be used to create a rim-light and throw some controlled light back into the subject’s face, if that’s the desired look. This style emphasizes textures and shadow, showing things like jersey folds really clearly.
I went with unmodified flashes for this shot, rather than using any modifiers to soften the light. This helped add some grit or edge to the shot, which I planned to boost as well in post.
We played a bit the positioning of the lights, checking the results each time to make sure that there wasn’t too much in shadow.
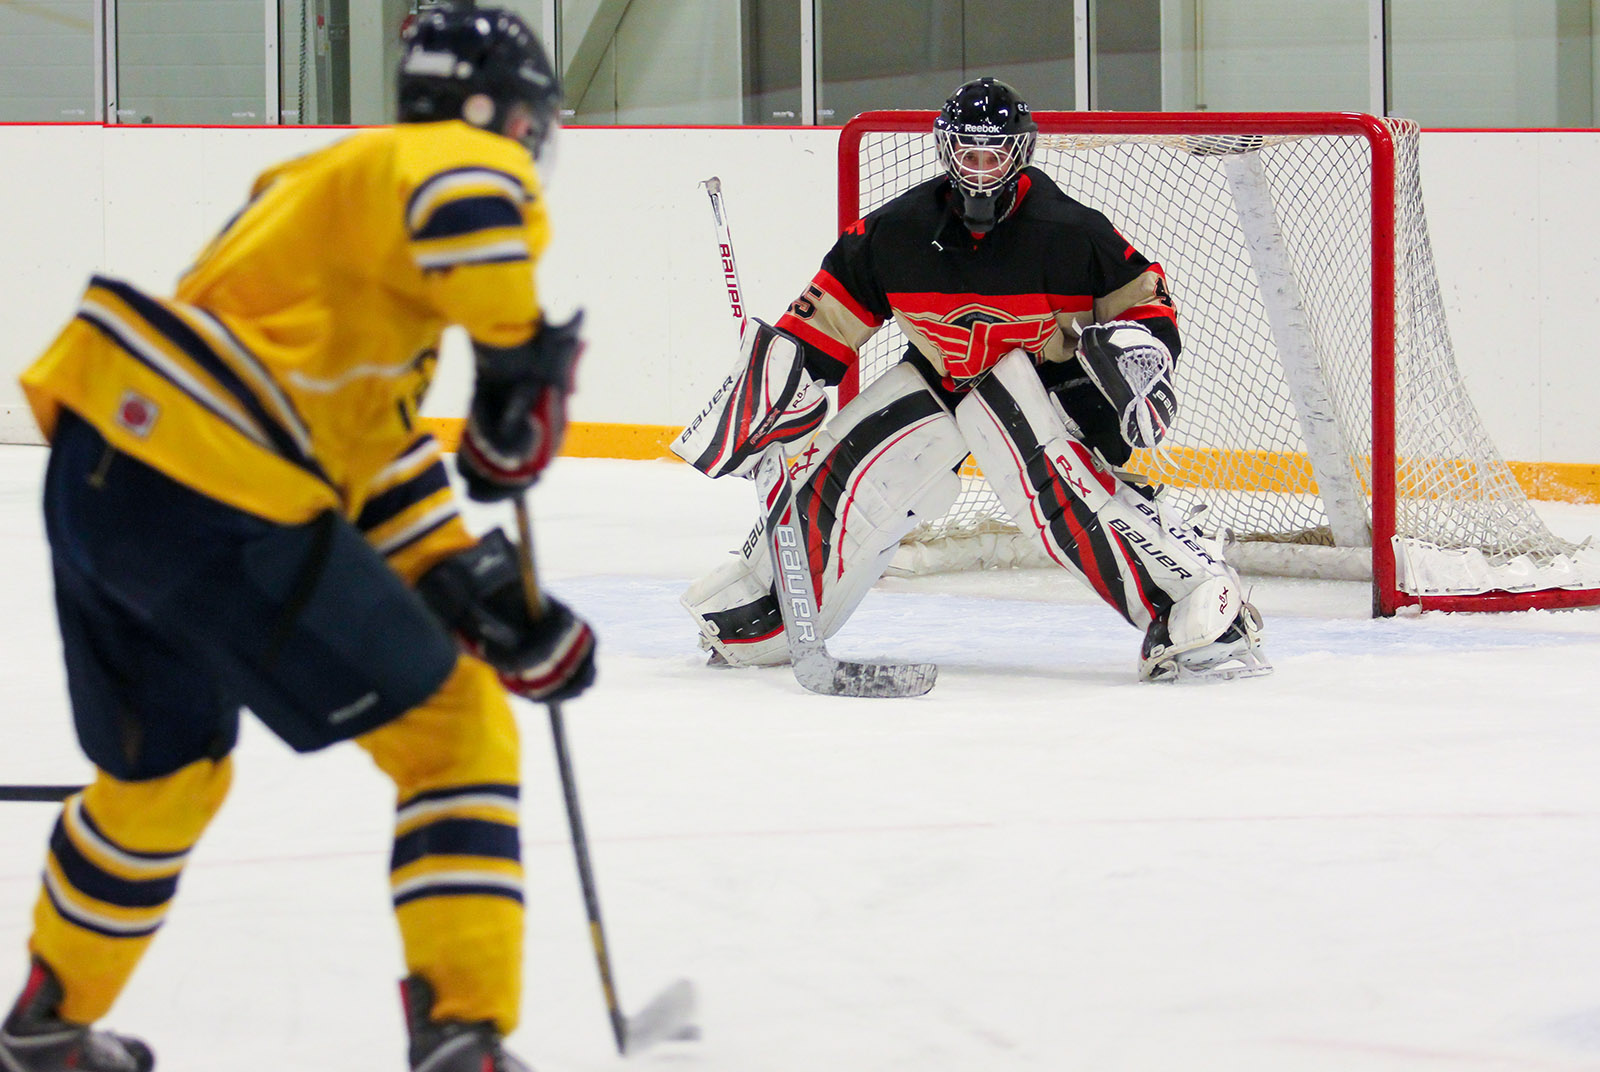
Before
Here’s the shot, right out of the camera:
f/8, 50mm, ISO 100, 1/250
No Results Found
The page you requested could not be found. Try refining your search, or use the navigation above to locate the post.
Post Processing
First up was some exposure control. RAW is wonderfully flexible for editing. Using adjustment brushes in Lightroom, I could simply “paint” the areas I wanted to be lighter.
Clarity is a setting in Lightroom that boosts local contrast. It makes pictures look gritty. I hit this picture with Clarity very hard. The goal was to bring out texture and give the picture an edge. I wanted to look as mean as possible, considering I’m a fairly small person playing the only position in hockey where you aren’t encouraged to hit people.
A tighter crop knocks out some of the annoying details and negative space on the sides. Then spot removal cleans up some bothersome details and nudging up vibrance helps bring the colour out more. I tried to have the red goal posts and the teal colour of the jersey stand out as much as possible from the background.
So here’s our “After” shot…

Things that could have been better
Fresh ice would have been nice. This picture came after an hour and a half long practice, so the ice kind of looks like crap. Getting fresh ice (and a killer reflection off the surface) would have been nice but was a luxury that simply wasn’t available.
The straps coming off the pads look a bit messy. I’m not a professional goalie (yet) so I don’t have top of the line equipment. If I was photographing Carey Price I definitely would have fixed that up during the shoot.
The shadows off the net and on the ice to the left also kind of bother me. Hard shadows are a result of using hard, unmodified light sources. Some more attention to placement might have made those shadows a bit more subtle.
But for a shot that took maybe 15 minutes to set up and take, I’d say I’m quite pleased.
If you have any questions, simply let me know in the comments!

About the Author
Hi, my name is Frank Myrland and I'm a photographer based near Orangeville, Ontario. While I am active in most types of photography, I mostly enjoy sports, events, family and commercial photography.
I like to learn by doing — and also to share my own experiences for the benefit of others, whether they are just getting into photography or if they are well on their way to mastering their style and craft.
Feel free to reach out to me if you have any questions at all at [email protected]
The latest posts from the Photography Blog
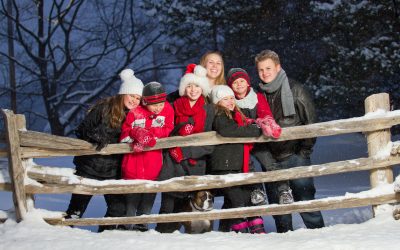
5 Tricks for Getting Great Natural Smiles for your Family Portraits
5 Tricks for Getting Great Natural Smiles for your Family Portraits One of the most important skills you can learn as a family photographer is how to coax natural smiles out of your subjects, whether they are young or old, during a photoshoot. Taking great...
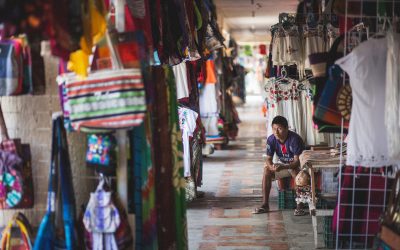
Street Photography in Tulum, Mexico
Photography on the Streets of Tulum, MexicoI’ve always been drawn to candid photography. Sure, posed portraits are also fun to envision and create, but candid photography has always seemed like a more authentic expression of life. For me, photography is a way to...
Review of the MIOPS Smart Trigger and Mobile Remote
Review of the MIOPS Smart Trigger & Mobile Remote I recently got the chance to test some photography gear from MIOPS, a rather innovative company that produces triggers and remotes that can help inject some creativity into your photography. Now, I already had a...
Hockey Photography: Tips for Hitting your Focus
Your Guide to Hitting Your Focus for Hockey Photography Read more in the Hockey Photography Series: Introduction Aperture Shutter Speed ISO FocusWhat Lens to UseHitting your focus is quite possible the hardest part of hockey photography. Even if you have the greatest...
Hockey Photography: Choosing Your ISO
Your Guide to using ISO for Hockey Photography Read more in the Hockey Photography Series: Introduction Aperture Shutter Speed ISO FocusWhat Lens to UseISO is an important piece in the puzzle to brings your final exposure together. Your knowledge of aperture and...
Understanding Aperture for Hockey Photography
Your Guide to Using Aperture for Hockey Photography Read more in the Hockey Photography Series: Introduction Aperture Shutter Speed ISO FocusWhat Lens to UseSo now that you have a sense for your shutter speed let’s take the next step and figure out our aperture....