
What are the best camera settings for hockey photography?
Read more in the Hockey Photography Series:
What is the Best Lens for Ice Hockey Photography?
Welcome to the world of hockey photography! You’re up against low light and fast action. Without a little bit of planning, it’s the perfect recipe for blurry pictures.
You ready for a challenge?
I’m going to compile a list of some excellent lenses that you should think about getting if you want to take your hockey photography to the next level.
Hockey Photography: Tips for Hitting your Focus
Your Guide to Hitting Your Focus for Hockey Photography Read more in the Hockey Photography Series: Introduction Aperture Shutter Speed ISO Focus What Lens to Use Hitting your focus is quite possible the hardest part of hockey photography. Even if you have the…
Hockey Photography: Choosing Your ISO
Your Guide to using ISO for Hockey Photography Read more in the Hockey Photography Series: Introduction Aperture Shutter Speed ISO Focus What Lens to Use ISO is an important piece in the puzzle to brings your final exposure together. Your knowledge of aperture and…
Understanding Aperture for Hockey Photography
Your Guide to Using Aperture for Hockey Photography Read more in the Hockey Photography Series: Introduction Aperture Shutter Speed ISO Focus What Lens to Use So now that you have a sense for your shutter speed let’s take the next step and figure out our aperture….
Using Fast Shutter Speeds to Photograph Hockey
Your Guide to using Shutter Speed for Hockey Photography Read more in the Hockey Photography Series: Introduction Aperture Shutter Speed ISO Focus What Lens to Use Hockey is a fun and fast sport, but it can also be incredibly challenging to photograph. This guide,…
An Introduction to Hockey Photography
Your Guide to Improving Your Hockey Photography Read more in the Hockey Photography Series: Introduction Aperture Shutter Speed ISO Focus What Lens to Use Hockey is a fun and fast sport, but it can also be incredibly challenging to photograph. This guide, presented as…
Taking an Outdoor Hockey Picture
Taking an Outdoor Ice Hockey Portrait It’s winter. In Canada. That means hockey. I recently took advantage of a rather fine day recently to get an action shot out on the pond. Here’s a rundown of what went into getting this image. To start with, here’s the final shot…
How to take a Dramatic Hockey Portrait
How to take a dramatic hockey portrait Read more in the Hockey Photography Series: It’s not every day you get to play with flashes at a hockey rink. So, here’s how to make the most of it. Hockey is fantastic, but taking great photos of hockey can be a nightmare….
Have you ever tried to shoot hockey with your camera set to “Auto” or “Sport” and been disappointed with the results?
Cameras are getting smarter every day, but it’s still a huge challenge for them to figure out how to deal with the challenges that come with photographing hockey. For example, the massive white ice surface often tricks the camera into shooting pictures that are too dark.
The good news is that with just a little bit of planning you can quickly learn to set up your camera in manual mode and make the most of your time at rink.
The extra good news is that lighting in an arena is often consistent. Sure, it may be consistently horrible lighting, but the fact that it isn’t changing means that once we find our ideal settings for shooting the action then we don’t need to change anything. No need to fiddle with settings every 5 minutes during the game.
Here’s what we’re going to talk about in this article:
Shoot RAW
How to build your shot
Shutter Speed
Aperture
ISO
Making Compromises
Focus
Back Button Focus
White Balance
Shoot!

Read more in the Hockey Photography Series:
What is the Best Lens for Ice Hockey Photography?
Welcome to the world of hockey photography! You’re up against low light and fast action. Without a little bit of planning, it’s the perfect recipe for blurry pictures.
You ready for a challenge?
I’m going to compile a list of some excellent lenses that you should think about getting if you want to take your hockey photography to the next level.
Hockey Photography: Tips for Hitting your Focus
Your Guide to Hitting Your Focus for Hockey Photography Read more in the Hockey Photography Series: Introduction Aperture Shutter Speed ISO Focus What Lens to Use Hitting your focus is quite possible the hardest part of hockey photography. Even if you have the…
Hockey Photography: Choosing Your ISO
Your Guide to using ISO for Hockey Photography Read more in the Hockey Photography Series: Introduction Aperture Shutter Speed ISO Focus What Lens to Use ISO is an important piece in the puzzle to brings your final exposure together. Your knowledge of aperture and…
Understanding Aperture for Hockey Photography
Your Guide to Using Aperture for Hockey Photography Read more in the Hockey Photography Series: Introduction Aperture Shutter Speed ISO Focus What Lens to Use So now that you have a sense for your shutter speed let’s take the next step and figure out our aperture….
Using Fast Shutter Speeds to Photograph Hockey
Your Guide to using Shutter Speed for Hockey Photography Read more in the Hockey Photography Series: Introduction Aperture Shutter Speed ISO Focus What Lens to Use Hockey is a fun and fast sport, but it can also be incredibly challenging to photograph. This guide,…
An Introduction to Hockey Photography
Your Guide to Improving Your Hockey Photography Read more in the Hockey Photography Series: Introduction Aperture Shutter Speed ISO Focus What Lens to Use Hockey is a fun and fast sport, but it can also be incredibly challenging to photograph. This guide, presented as…
Taking an Outdoor Hockey Picture
Taking an Outdoor Ice Hockey Portrait It’s winter. In Canada. That means hockey. I recently took advantage of a rather fine day recently to get an action shot out on the pond. Here’s a rundown of what went into getting this image. To start with, here’s the final shot…
How to take a Dramatic Hockey Portrait
How to take a dramatic hockey portrait Read more in the Hockey Photography Series: It’s not every day you get to play with flashes at a hockey rink. So, here’s how to make the most of it. Hockey is fantastic, but taking great photos of hockey can be a nightmare….
Shoot RAW
In case you’re not familiar with it, RAW is a shooting mode offered on most cameras that offers more flexibility for editing afterwards.
When you shoot in JPG, your camera compresses the image, throwing away information in order to make the file as small as possible. But when you’re shooting in a demanding environment like a hockey arena, you’re going to want to keep all that data.
Shooting in RAW gives you greater ability to edit exposure and white balance after the fact. You’re very limited with what you can edit with a JPG before the image starts losing quality and looking unnatural.
The drawback is that RAW files are much larger, often double or even triple the size of a JPG. So invest in a large memory card to make sure you room have for all those shots!
How to build your shot
Every picture a camera takes depends on three settings: Shutter Speed, Aperture and ISO.
You get the shot you want by balancing these settings. Adjusting each one will make the picture either brighter or darker, so you’ll have to adjust the settings on another in order to bring the final shot back into balance.
Depending on how challenging the light conditions are, you sometimes need to compromise on what you’d choose as ideal camera settings, just because there simply isn’t enough available light.
When I take hockey photos, here’s how I prioritize these “Big Three” settings:
- Shutter Speed
- Aperture
- ISO
Let’s take a deep dive into each to see what we need to consider for each of these settings as we flip our camera over to “Manual”.
1/250, 3.2, ISO 2000
Step 1: Shutter Speed
The reason I think about shutter speed first is because I don’t want to come home with a card full of blurry photos.
Hockey is a fast sport. Unless you’re photographing a game with kids who are still learning to skate, you’re going to need a fast shutter speed to freeze the action.
On your camera, shutter speed is displayed in fractions of a second — for example, 1/25, 1/100 or 1/500.
There’s no hard and fast rule on what shutter speed you should select; it depends entirely on how fast the game is. The important thing to note here is that the faster the shutter speed, the darker the picture.
If you’re photographing a speedy NHL winger on a breakaway, you’re going to need 1/500 at a minimum, and even then you’re likely to see some blur.
If you’re photographing the game at a local rink, you might be able to get away with 1/200 or maybe even lower.
We’re going to get into how we can use our aperture and ISO to counterbalance a fast shutter speed, but it’s important to be aware of this when choosing a shutter speed.
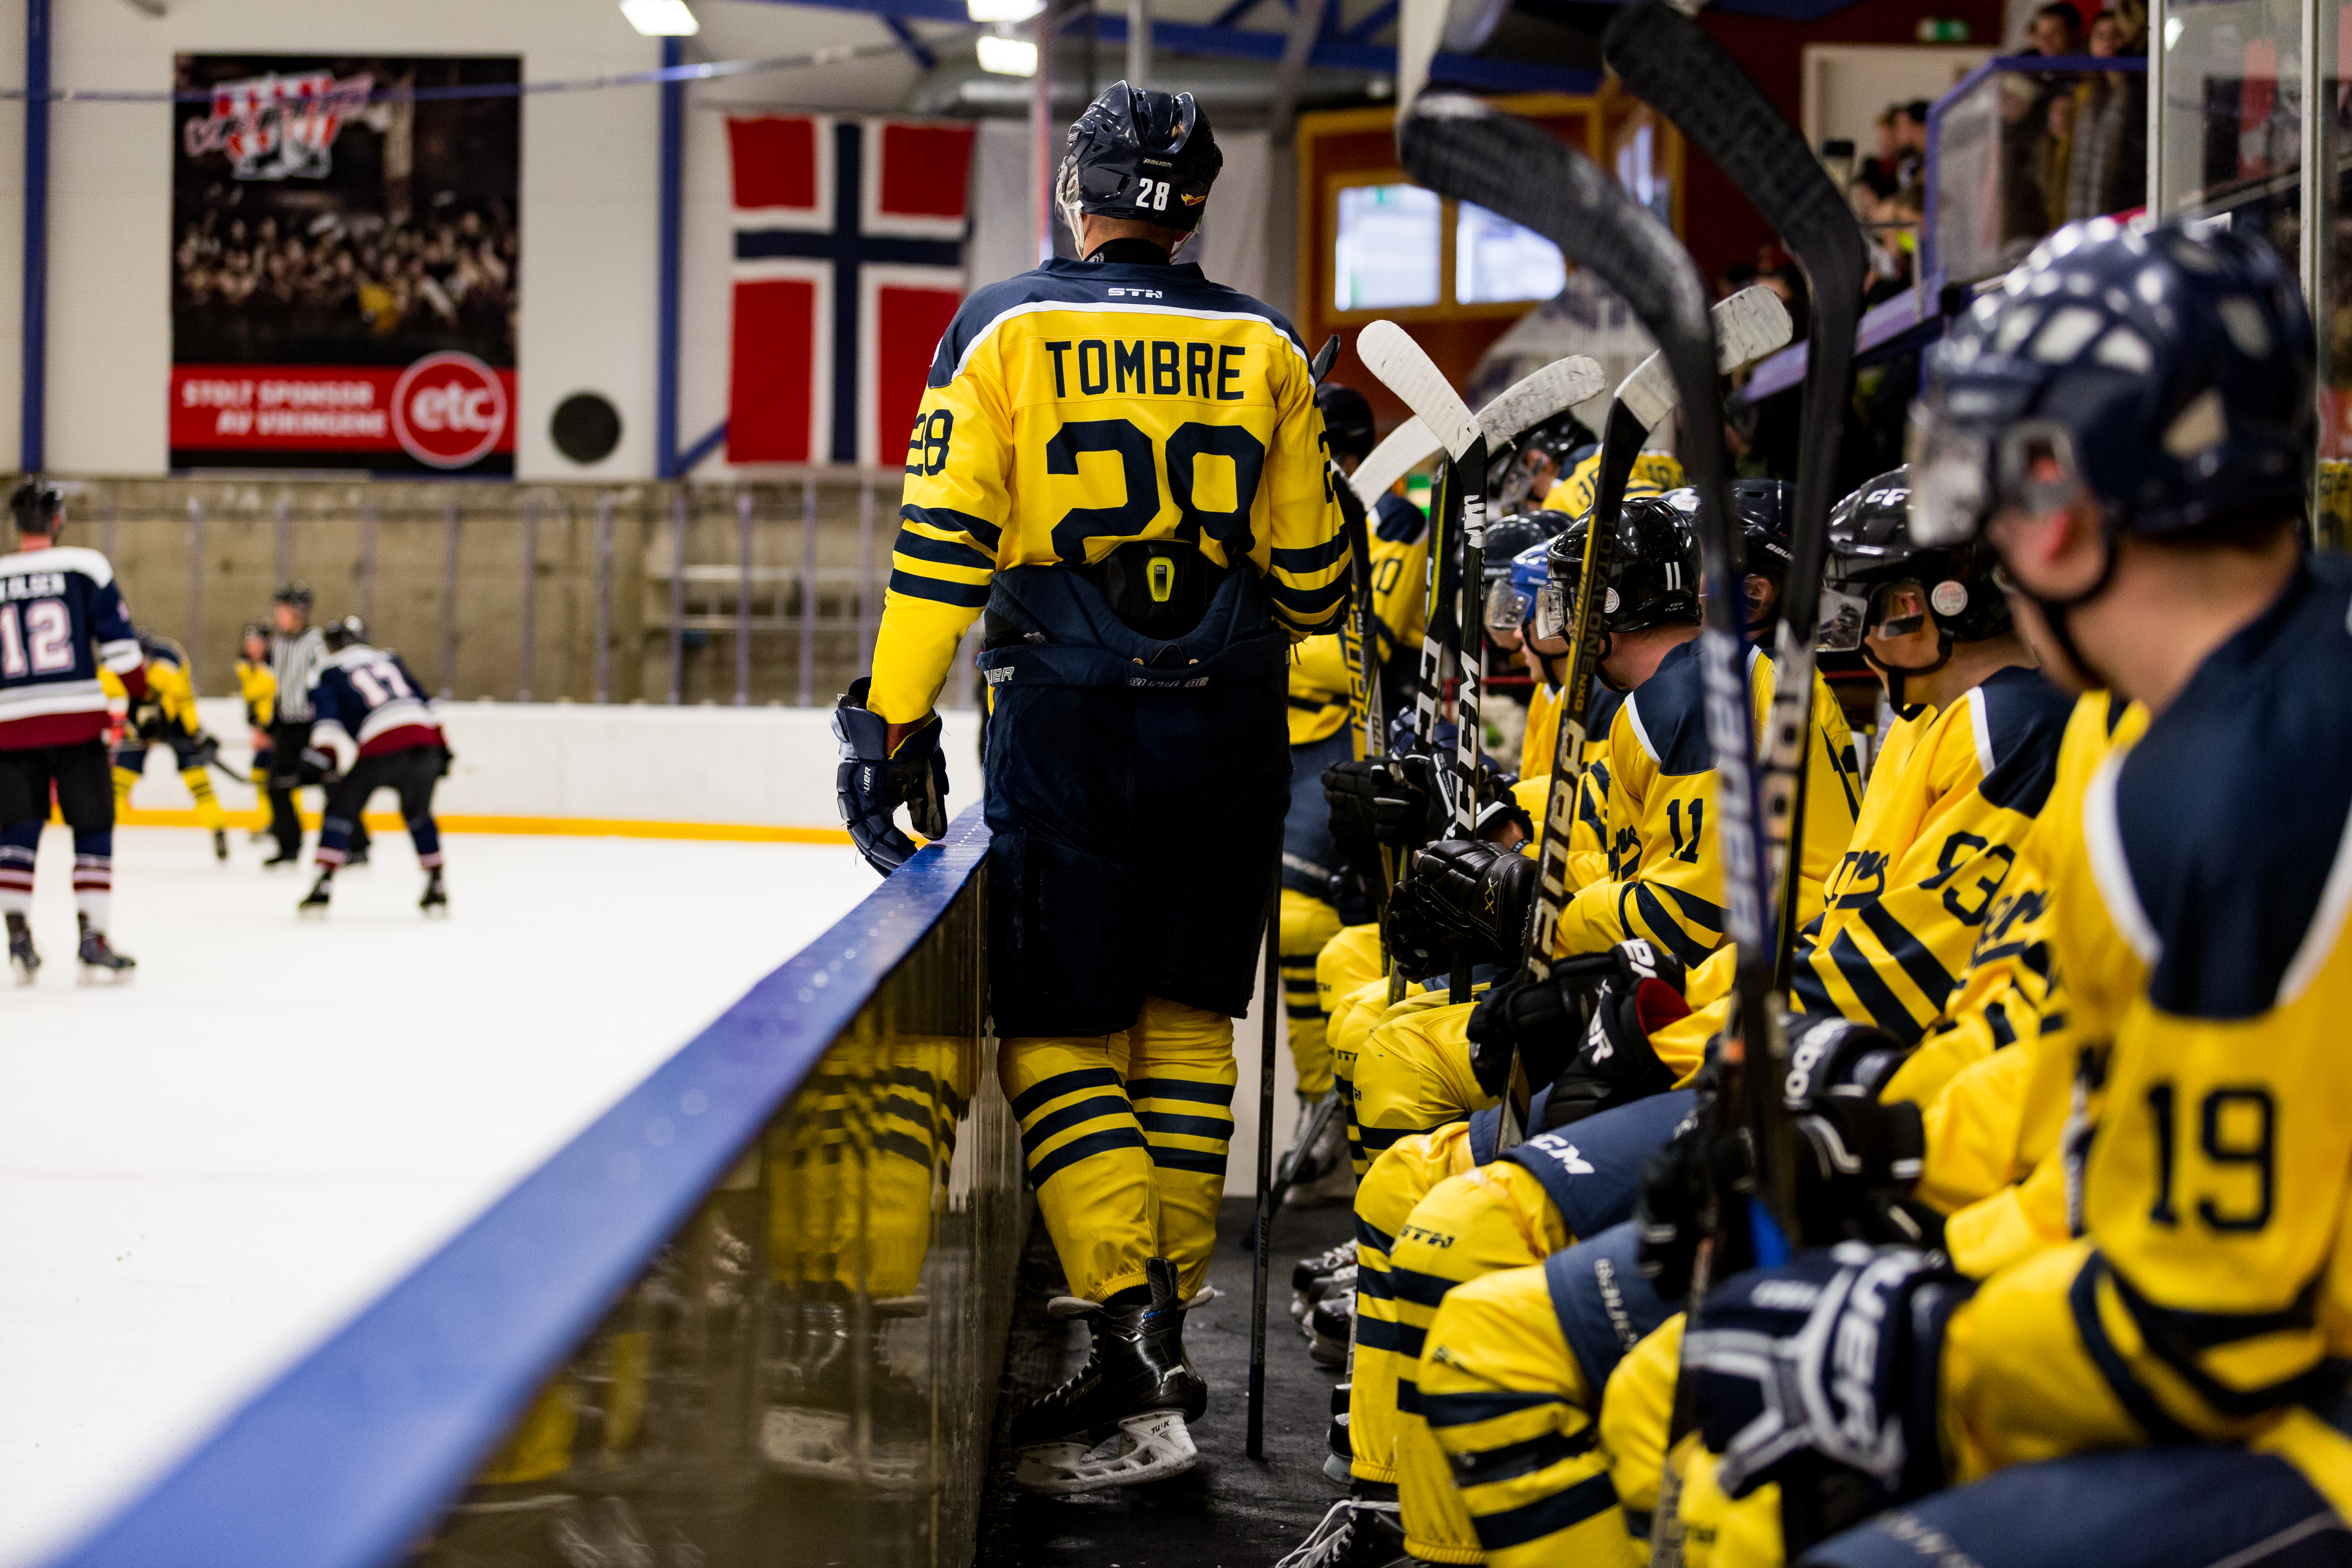
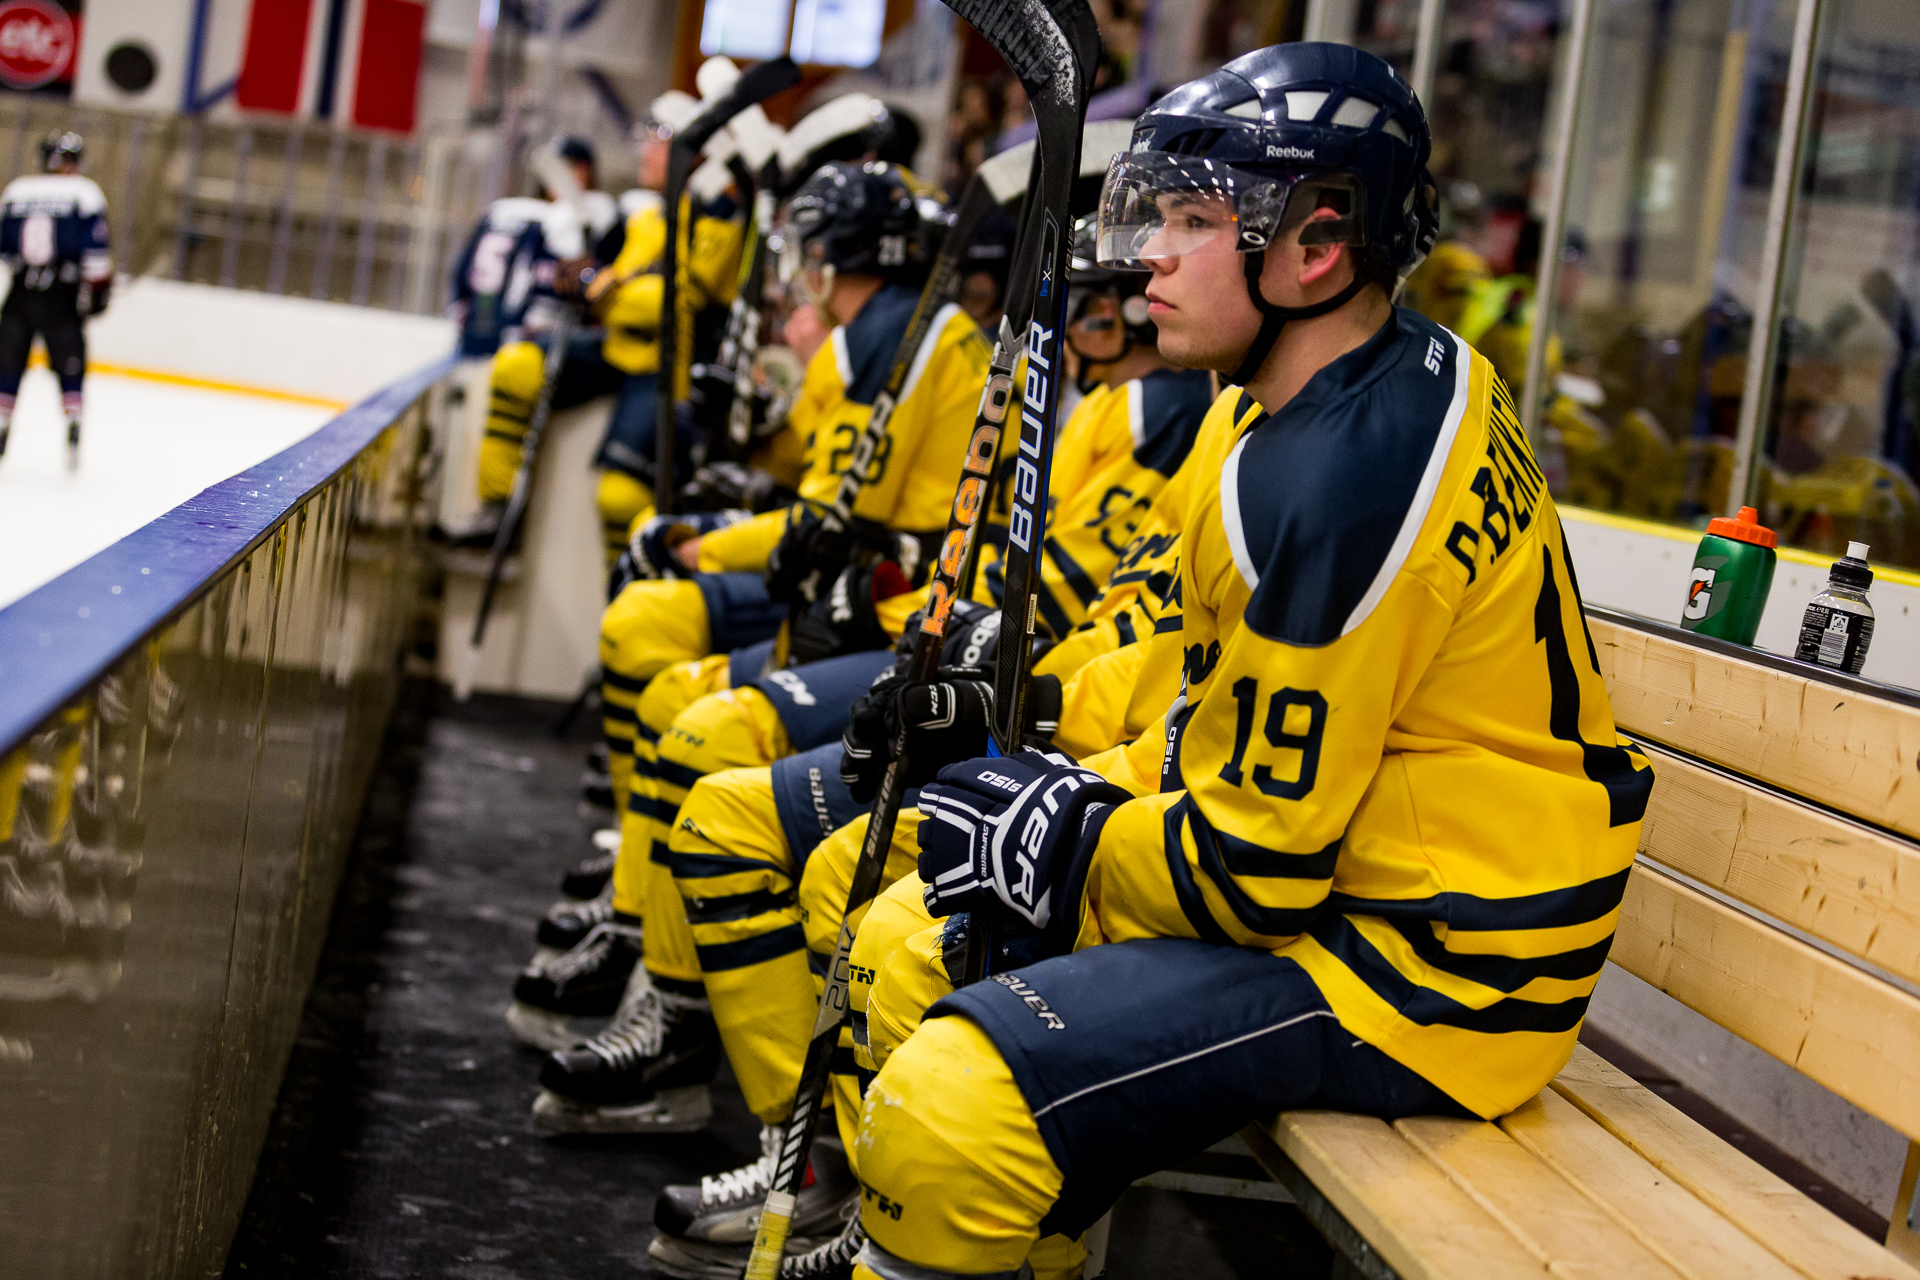
Now bear in mind that you won’t need a super fast shutter speed if the play is stopped for a face-off or if you’re photographing players on the bench.
Also, if you want to use blur creatively to show the speed of the game, you can also slow down the shutter speed and try using panning techniques to give a cool sense of the speed.
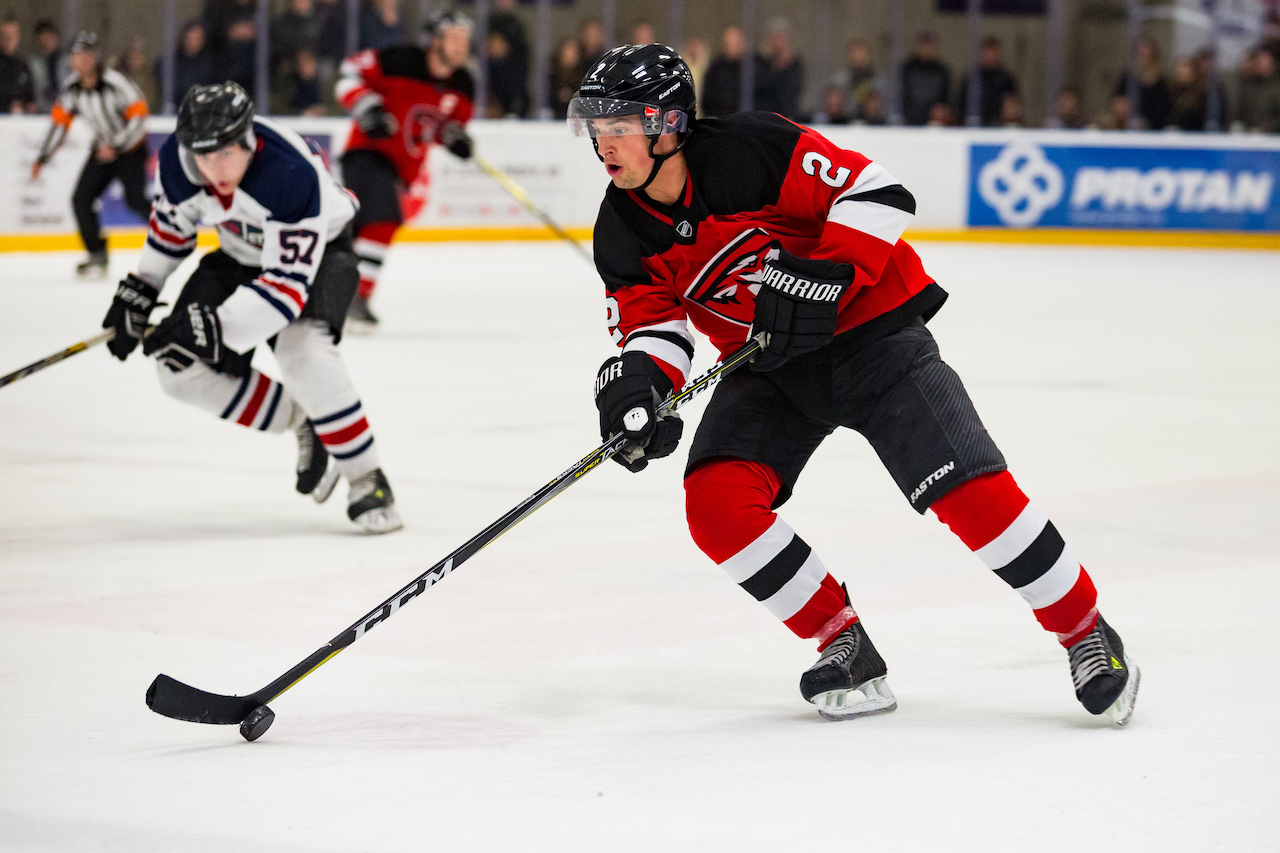
By selecting a shutter speed of 1/640 the players (and the puck) are frozen in the picture, even though they are moving up the ice at full speed.
Step 2: Aperture
Alright, you’ve got your shutter speed selected. Next up is choosing your aperture.
Your aperture is the size of the opening in the lens that allows light into the camera. Aperture also controls the depth-of-field, which is the amount of background blur behind the picture’s focus point.
On your camera aperture is displayed with numbers like 2.8, 5.6 or 8. The lower the number, the wider the aperture and the brighter the picture.
Lenses all have different maximum apertures. Typically cheaper lenses can’t open as wide, so they can’t collect as much light. Or the maximum aperture may adjust as you zoom, so the settings that were good when you are zoomed out become too dark when you zoom in. The more expensive lenses have wider aperture to collect more light, and can maintain that same aperture as they zoom so that you have consistent settings.
Ultimately, there isn’t usually much flexibility with aperture at a hockey rink. You will want the lens to bring in as much light as possible, simply because there isn’t much available light to begin with.
Start with the widest aperture your lens offers, regardless of whether this is 1.8, 2.8 or higher.
Prime lenses (lenses that don’t zoom) often offer a wider aperture, which makes them an intriguing option for hockey photography.
You’ll quickly find that shooting a fast sport at 1.8 is tricky because of depth-of-field. Like I mentioned above, DOF controls how quickly the image becomes blurry behind the focus point.
If your camera can’t keep up with a fast moving player, you’ll come home with a whole bunch of out-of-focus pictures.
Usually it’s best to aim for an aperture around 2.8, to collect a lot of light, and then see if the pictures you take are in focus.

Using an aperture of 3.2 for this shot blurs the faces in the crowd so they don’t distract from focal point of the image. The wide aperture also collects lots of light so we can keep the shutter speed high enough to capture the action in front of the net.
Step 3: ISO
And just like that we’ve come to the last of the “Big Three” is ISO.
ISO is the sensitivity of your camera sensor to light. It is expressed in numbers like 200, 800 and 1600. The higher the number, the brighter the picture but at the cost of more noise and lower picture quality.
I leave ISO for last because it can be used to balance the decisions you made with your shutter speed and aperture.
Unless you’re playing outdoors or in the brightest hockey rink in the world, you’re going to need a high ISO of something like 1600 or 3200 in order to get the right exposure.
Again, it depends on how much light you’re working with, so there is no “perfect” setting.
Expensive cameras can handle higher ISOs without much loss of image quality — but starter cameras can really struggle even at ISO 1600.
So without further ado, let’s go to the next important step in choosing the right camera settings for hockey.
This shot uses an ISO of 2000, which helps collect as much light as possible from the dimly lit arena. By keeping the ISO high we are able to select a shutter speed of 1/500 and an aperture of 3.2.
Step 4: Making Compromises
It was all so easy up until this point.
You wanted a super fast shutter speed, a wide aperture and a low ISO for great picture quality, but the resulting image is completely dark.
Not enough light.
So now we have to make compromises and balance our settings until we get the right exposure.
If my ISO is through the roof then I might have to turn the shutter speed down a bit and accept a little more blur. Or open up the aperture a little wider and maybe end up with more out-of-focus images.
If I’m already at my max aperture with my lens, I’m kind of stuck. If I’m serious about ice hockey photography then it might be time to invest in a lens more suited for the conditions.
It’s a balancing act and nobody likes making compromises, but unless you have the option to add a whole lot more lighting to the arena then you have to deal with what you’ve got.
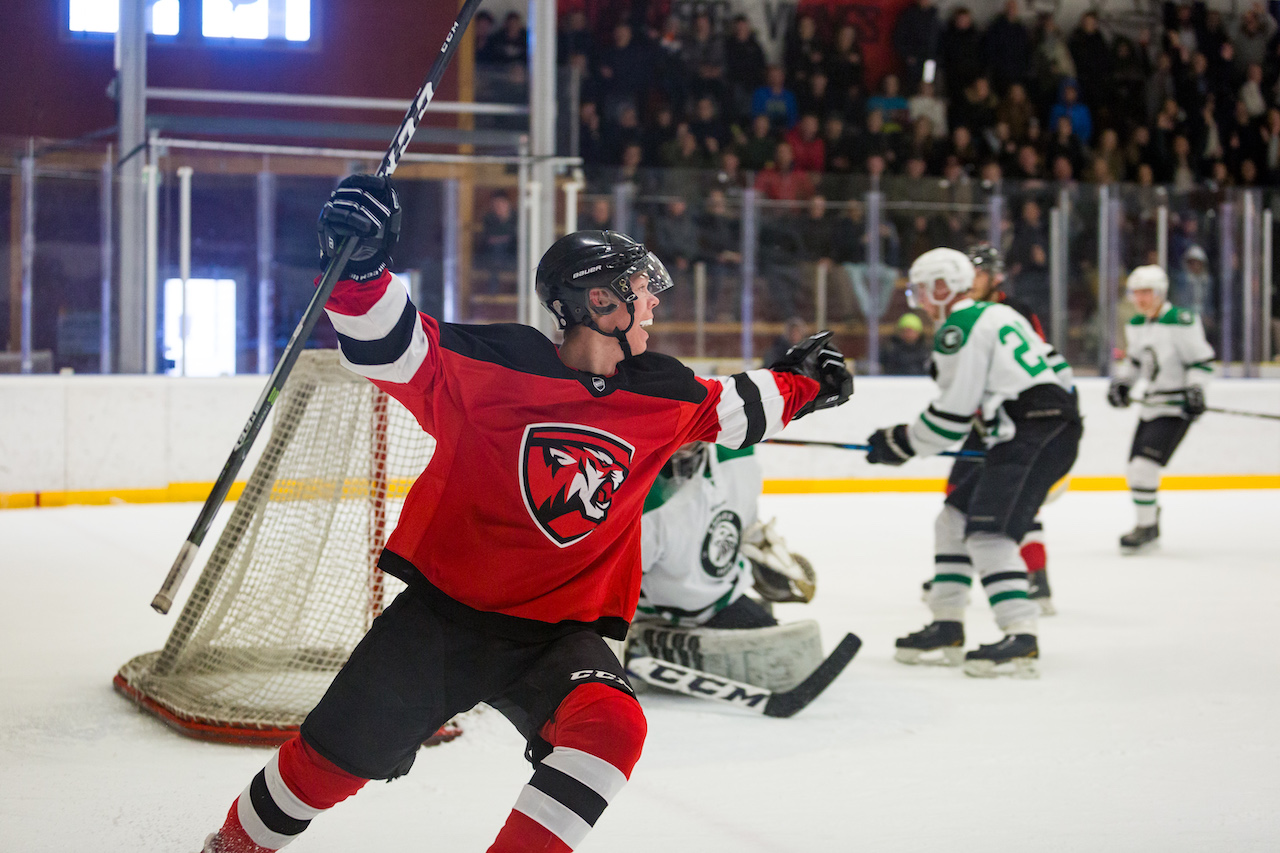
It can be a real challenge to deal with mixed lighting but that just makes it extra rewarding when you get the celebration shot!
1/500, 3.2, ISO 2000
Focus
Alright, you’ve got your exposure figured out. Good job!
Next up is selecting the right focus settings on your camera so you give yourself the best possible chance to get the shot.
First you want to select AI Servo (Canon) or AF-C (Nikon). This is a focus mode that continues tracking the subject, as opposed to locking the focus.
This is important for moving subjects. If your focus locks, they could be far past that focus point once you take the picture.
In addition to this, your camera focuses using many different focus points — the amount varies depending on what kind of camera you have.
The challenge with relying on all of these focus points at the same time is that your camera won’t necessarily focus exactly on what you wanted it to. When players are criss-crossing and zig-zagging then you can miss a great shot because your camera locked on the advertisements on the boards in the background.
Fortunately you can select zone focus, which relies on only several focus points, or even single point focus, which uses only one focus point, in order to focus as accurately as possible.
The more precise you get with your focus points, the more precise you will need to be as a photographer when it comes to tracking the action.
Find the focus mode that works for you! If you’re missing your shots then switch back to zone focus or even just stay on all focus points until you feel that you can track the action.
All this talk about focus brings me to what I consider to be one of the most important secrets for how to get great sports photos.
Back Button Focus.

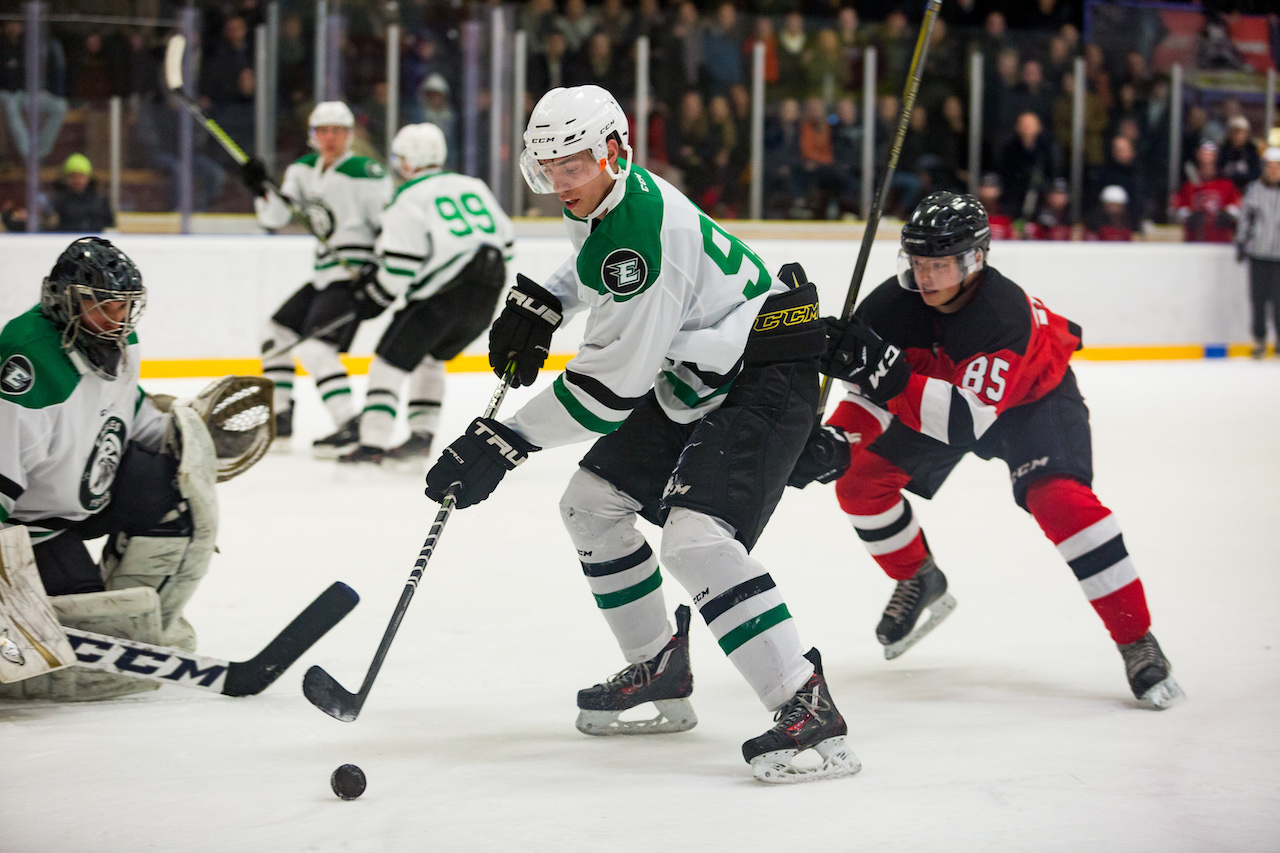
Selectively focusing on the goalie here is possible because of single point focus. If it was up to the camera to decide what to focus on, it might have chosen the players at the face-off dot and completely changed the final image.
1/640, 3.2, ISO 2500
Back Button Focus
This is an option that should be available on most, if not all DSLRs.
With back button focus, you focus using a button on the back of the camera using your thumb instead of by holding the shutter button half down.
This separates the action of focusing and taking the picture, which ultimately gives you more control over both.
Use your camera manual to find out how to switch to back button focus and give it a try!
White Balance
Remember back when I was talking about RAW? Well, if you took that advice and made the switch then this section won’t be as important.
With RAW you can adjust your white balance when editing without losing any quality.
If you shot JPG then it’s incredibly important to get white balance right when you’re shooting, as there is very little flexibility when editing afterwards.
For many events in life, Auto White Balance does an admirable job. At an old hockey arena with outdated, flickering lights, however, you’ll get a lot of shots tinted with too much yellow, blue or green.
White balance on your camera is shown in Kelvin, with numbers on a sliding scale like 3200, 6000, 7800. The lower the number, the more blue the picture will be. The higher the number, the more yellow the picture will be.
There is also a sliding scale between green and magenta.
Take time before the game starts to adjust your white balance so that the ice and boards look like they do in real life — not too yellow or blue.
The challenge is when you have a colour temperature shift. This is when there are inconsistent types of lighting used in the arena, leading to one section of the ice appearing more blue than the rest.
There isn’t really a cure for that, unfortunately, except perhaps to donate enough money for the rink to update their terrible lighting system.
Keeping the ice white and making sure skin tones look natural can be a bit of battle. By correcting RAW images later or by taking time to select the right white balance in camera when shooting JPG we can make sure that the final shot looks like it did in real life.
Shoot!
Your exposure is locked and your focus is set. All that’s left to do is to shoot!
Getting the settings right is half the battle. Now you’re going to need to position yourself so you are in the right places to capture the action, and learn how to anticipate the big moments so that you don’t miss a moment.
Hockey photography is a real challenge, but also a fun way to improve your skills as a photographer.
Good luck!
If you have any questions, simply let me know in the comments!

About the Author
Hi, my name is Frank Myrland and I’m a photographer based near Orangeville, Ontario. While I am active in most types of photography, I mostly enjoy sports, events, family and commercial photography.
I like to learn by doing — and also to share my own experiences for the benefit of others, whether they are just getting into photography or if they are well on their way to mastering their style and craft.
Feel free to reach out to me if you have any questions at all at [email protected]
The latest posts from the Photography Blog

Preparing for Your Family Photography Shoot: 6 Important Things to Consider
Preparing for Your Family Photography Shoot: 6 Important Things to Consider Planning a family photoshoot? This short guide will give a list of what to consider in advance to make sure to get the most out of the time and have confidence you’ll get some great pictures!…
How to Take Photos from the Grandstands of the Canadian Formula One Grand Prix in Montreal
How to Take Photos from the Grandstands of the Canadian Formula One Grand Prix in Montreal While all sports are challenging to photograph in their own way, Formula One is an especially difficult event to capture for the casual photographer. This guide is a summary of…

The Top 5 Reasons to Book a Corporate Headshot Photoshoot for Yourself or Your Team
The Top 5 Reasons to Book a Corporate Headshot Photoshoot for Yourself or Your Team A professional, current headshot is a must in today’s digital-first society. For many lines of work, the difference between a good or a not-so-good headshot might be the dealbreaker in…

What are the benefits of commercial photography for your small business?
What are the benefits of commercial photography for your small business? How do you quickly grab a potential customer’s attention? People don’t read anymore and there are a million different distractions competing for interest, so anything mundane or expected isn’t…

What is the Best Lens for Ice Hockey Photography?
Welcome to the world of hockey photography! You’re up against low light and fast action. Without a little bit of planning, it’s the perfect recipe for blurry pictures.
You ready for a challenge?
I’m going to compile a list of some excellent lenses that you should think about getting if you want to take your hockey photography to the next level.
5 Tricks for Getting Great Natural Smiles for your Family Portraits
5 Tricks for Getting Great Natural Smiles for your Family Portraits One of the most important skills you can learn as a family photographer is how to coax natural smiles out of your subjects, whether they are young or old, during a photoshoot. Taking great photos of…
Hey! What camera and lens did you use for these shots?!! they’re awesome!!
Thanks for the kind words!
The majority of them are shot on a Canon 5DMk3 with a Canon 70-200mm 2.8 lens.
If you want to read more about the best options for lenses, you can see my other blog posts here: https://frankmyrland.com/best-lens-for-ice-hockey-photography/
Hi Frank – Just wanted to thank you for such an informative blog post! Your advice has helped me immensely over the past three years as I have photographed dozens of games for a local girls high school hockey team. They consistently compete for the state championship. I’ve been shooting with a Pentax 70-300 F4 at 1/640 and 1600ISO and the shots come out well, but for this year’s playoffs I’m going to rent a 50-135 F2.8 – losing a bit of reach, but I like being able to go a bit wider for up close action, and I have come to agree with your advice that trying to get good shots at the opposite end of the ice rarely results in anything good. It’s funny how I’ve come to know every local rink in SW Connecticut, its lighting, where the good spots in the glass are, etc.
If you have any interest in seeing how your advice has helped my, check out https://www.jaybwilsonphoto.com/dhs-hockey-2022-2023
Thanks again!
Hi Jay — awesome to hear! Your shots look great and I’m glad that some of what I’ve shared has been helpful.
The 50-135 should do a great job for you .. and it also gives you a bit more light to work with at a max aperture of 2.8 compared of your usual F4. Often people think about the long zoom lenses and having a ton of reach, but it’s absolutely true that the wider angle shots can show the speed of the game in a really cool and dramatic way that long lenses can’t do.
Good luck!
Hi Frank – Thanks for the kind words. Used the 50-135 2.8 for the semi-final game and images are a lot cleaner with little noise, as I was able to go down to ISO800. One challenge – I missed a lot of shots due to focus, which has never been an issue with my 70-300. May just be getting used to the new lens, but for tonight’s final, I’m switching to single point focus (variable setting that expands the single point to zone if needed). I’ve always done zone but will do the single point tonight, as I’m fairly confident in my ability to track the action at this point. Any other tips for single point focus (yes, I’m using back button religiously).
I’ve also had the experience of taking a bit of time to get used to a new lens. Most cameras do also have adjustable focus settings in terms of tracking speed and sensitivity as well, so maybe double check those options.
Single point focus is very fun and keeps the photographer busy, as I find relies a lot on anticipating the movement of the play to get the shot lined up right.
I typically rely on zone focus for hockey but do occasionally switch it up if I feel I’m missing shots, especially whenever I find that the zone focus consistently catches the wrong target.
Definite improvement this past game (division champions!) although I still missed more than I normally would. And yes, single point keeps you busy! As the state playoffs start I hope to continue to improve. Thanks for all your advice, Frank, this is a great blog post, and I appreciate your prompt responses.
Frank,
You seem well versed in hockey pictures and tech. Great. I took my first Bantam hockey pictures last night. I have a Nikon D7500 with a Sigma 70-200 F2.8 lens. I experimented some. I kept my Fstop at 2.8 and fluctuated my shutter anywhere from 1/500 to 1/1000th. Auto ISO. Pictures looked a little dark. My ISO bounced around 640 to 1600. I read that images should be looking even good at ISO 3200.
My pictures look grainy at 100% in Photoshop! Ouch! I’m shooting in RAW and Fine Jpg format. Should I be viewing the final image at 100%? My image size is 12×18 in Photoshop.
Thanks
Hi Steve, thanks for commenting! I would definitely recommend that you change from Auto ISO to manual. As long as the lighting conditions are unchanging, which they should be in most arenas, then you can dial in the right exposure and then leave your settings and trust that images will come out consistently.
On Auto ISO, your camera’s exposure will vary a lot based on the background of the shot. If the background has lots of white ice or boards, the camera will opt for a darker exposure, whereas if the background includes lots of dark seats or stands, the camera will boost the ISO to try to make the whole image lighter to compensate. So manual ISO makes life more predictable!
In terms of grain, it’s not something that can avoid completely. Gentle use of noise reduction in Adobe Lightroom or a similar editing program will help .. just don’t overdo it or you will lose all the textures in the image.
Note that ISO performance does depend a lot on the model of camera — both on how new the camera is and whether or not it is a full frame camera with a large sensor.
As the Nikon D7500 is not a full frame camera, there’s a little less leeway with high ISO values. I’d recommend trying not to go above ISO 1600 where possible .. but personally I would prefer a sharp picture with grain over a blurry picture.
Try starting with something like f2.8, 1/250 or 1/500 and ISO 1600 and then adjust to taste!
Ive been taking some hockey images here: https://www.barr-photography.com/work/page-4hockey
Would a Full Frame camera be better at hockey than my crop sensor camera with my 70-200 lens? Some of the Full Frame cameras such as the Nikon D810 or even the D780 doesn’t have a better auto focus system than a Nikon D500 Crop sensor camera. My Nikon D7500 starts having bad noise at ISO 3200. I shoot at F/4, 1/000 and 3200 ISO. I would shoot F2.8, but my dof takes a hit.
Hi Steven!
Yes, a full frame camera is preferable, just due to improved picture quality and ISO performance from the large sensor size.
You are correct that I don’t think there will be a huge difference in focus speed and accuracy — that depends more on different components of the camera unrelated to sensor size.
Note that will a full frame camera, the focal length of your lenses is different than with a crop sensor. Focal length is actually magnified through a crop sensor (for Nikon I believe it is 1.5x), meaning that 200mm on a crop sensor camera is actually equivalent to 300mm on a full frame.
So with a full frame camera you would have less “reach”, but the improvements in quality are well worth it!
Thanks for the article; you’ve got a lot of great advice! I’ve been the photographer for a local adult hockey league for almost a year now, and they’re preparing to go into their second season with clinics I’ve been there for almost every week. I recently upgraded from a Sony a6100 to a Sony A7RIV and since they’ve been letting me on the ice with them I’ve been using a 35mm lens and getting some really unique shots, which is awesome! The problem I’m running into is my settings, more specifically I believe my ISO. Last season I was able to get away with a shutter speed of 1/640, an ISO of either 640 or 800 depending on the game, and using a 50mm lens with an f-stop usually at 2.2 or 2.5.
Now I’m finding that even with my 35mm lens at f/2.2, my shutter speed at 1/500, and an ISO of 800, my images are now dark *and* grainier than my photos last season. It could be that I’m still adjusting to a new camera or maybe that I haven’t figured out editing entirely, but even after applying my usual edits in Camera RAW my pictures look nothing like yours even with a lower ISO.
Should I just bite the bullet by going with a higher ISO to get the brightness back in my images, or is there some other trick I can try to avoid some of the grain? I’m hesitant to bring the Noise Reduction slider above 25, but if that’s what it takes to clear up my photos I’m happy to do so.
That sounds like a very unusual problem! I take it nothing about the lighting in the arena itself has changed? Light is light, regardless of camera, so I almost wonder if there is a camera setting turned on somewhere? I’m not familiar with the Sony A7VRIV myself but I hear it’s a great camera so it’s unusual to hear that it would seem to underperform against an lower end model.
Personally I prefer a higher ISO in order to keep the exposure near where I want it to be since brighting images in post will introduce more grain into the shot as well.
The amount of grain that is “acceptable” for a final image also depends on personal preference, but also on how and where you are sharing the images. I know I can get caught up in trying to fine tune the image at 100% zoom and forget that most people will either see it on social media or in small prints where all my minor modifications aren’t even noticeable.
A dynamic, interesting, well-composed picture with some grain beats a forgettable picture without grain every day of the week in my book 🙂
Very nice. I liked your thoughtful replies to comments/questions. First time grandson’s high school hockey game. I was concerned about ice looking a little less bright and dark faces but notice thE current face masks are larger and have more dark bars than the plastic type in your pictures so I suspect light is part of problem. I am using Nikon 7500 with 70-300 zoom. Shooting Manuel at 1/2000, ( but after your article will try a little slower), aperture limit at full zoom is 5.6; I am using auto iso with maximum set to 6400.( after your article, I will try to lower iso to get crisper colors, but not sure if that will decrease light) I have been trying exposure compensation and have gone all the way up to +5.
Anyway, thanks a lot
Hi Larry — Glad you found the article useful!
Yes, I would recommend slowing your shutter speed to around 1/500 as that would also you to decrease your ISO to around 1600 without losing any light.
So your final settings would be something like 1/500, f5.6, ISO 1600. If that comes out too dark, you can move the ISO back up until you have the exposure you are looking for.
Rather than using exposure compensation, I would recommend going full manual as the lighting in arenas is typically consistent.
The challenge with using exposure compensation is that it is still leaving it up to the camera to “evaluate” the scene and come up with the proper exposure.
Since lighting is the same, finding the right settings on manual and leaving them there will produce more consistency from shot to shot.
Good luck with getting some great photos!
Hey Nate, i have the A7R4 as well and tried shooting indoor hockey last week.
I have the 90mm 2.8 G and i do have the same “issue” with noise. Many reviewers mention that having so many pixels (61) on a full frame might cause the higher noise.
I wrote to a professional photographer in landscape and wildlife and told me to try a higher speed, 1/800 or above and ISO around 1600.
Will test this on next tuesday.
By ghe way, it’s an amazing camera for daytime landscape, falls…
Good luck
Thanks for this great article! I typically shoot with my Nikon D3 and a Tamaron 70-200 lens, and struggle with noise issues at times when shooting hockey games. My ISO remains at 2500 while shooting in Aperture priority, but the problem is that reducing the ISO affects the focus of the action and lighting. Any suggestions?
Hi Garry! Unfortunately this problem will exist whenever there isn’t much light to work with. High ISOs are a necessary evil in most poorly lit arenas or else you would end up with a blurry shot.
The goal is to find the balance, where your shutter speed is fast enough to capture the action, your aperture is wide enough to bring in as much light as possible without missing focus, and your ISO is as high as needed in order to result in a properly exposed final image, which may result in an image with a lot of noise.
That’s as much as you can do — unless you can convince the arena you are in to purchase better lights!
Really appreciate the feedback Frank! I will continue testing for sure in order to find the right balance in produce tack sharp game time hockey captures! Cheers!
Hi! I’m a high school publication photographer and I recently photographed a hockey game. The photos turned out pretty well, but the colors were extremely dull and muted. But it also didn’t look the most vibrant in real life, so part of it may have been the rink lighting, but in your example photos the colors are crisp and clear, and I wanted to know how you got them like that. My shutter speed was 1/1000+, f stop was low, and ISO was pretty high (4000+). I have a canon eos 80d from my school and a 200mm lens that I think should be pretty good too, which is why I’ve been able to get away with such a high ISO. The focus and everything looks good, I just want to know how to fix the colors. Is it all in the editing or are there tips to do so while in action? Thanks!
Hi Jennifer! It sounds to me like the high ISO is the culprit here.
How far you can push the ISO before the colours start to fall apart, as you’ve described here, depends on a couple things:
– Is the camera full frame or crop sensor?: Cameras with full frame sensors (like the Canon 6D) can handle higher ISOs better than crop sensor cameras (like your 80D). Normally I hate saying that the camera is a factor, but this is the one exception where a “better” camera really does help!
– How recently the camera was made: Modern technology continues to improve cameras, which includes how well images hold up with high ISOs. The older the camera, the more pictures will start to “break down” at high ISOs.
Though rink lighting doesn’t usually give much wiggle room, my first recommendation would be to bring your shutter speed down a bit to 1/500 and, if possible, bring down your f-stop/aperture a bit too. As a result of this, you’ll be able to lower your ISO.
You can see that the majority of images shot in this article are at ISO 2000 on a full frame camera. With your 80D, see if it’s at all possible to get your settings to ISO 2000 (or even 1600) and you’ll start seeing more vivid colours!
A little bit of a boost during editing does certainly help, but it’s best to try to get as close as possible to the final shot right in camera.
One more important point is that the quality of the glass at the rink you are shooting through is important too. If you are shooting through scuffed up glass full of puck marks, it pretty much doesn’t matter what your camera settings are .. the colours and contrast are going to come out very dull.
Just wanted to say thanks, I am very comfortable with a camera mostly nature photography but have never taken any rink shots.
Just wanted to say how well written this – Simple directions and clear. Thumbs up.
I’m glad that you enjoyed the article!
Wonderful article! With two sons playing hockey (high school and college (Big 10 D2)) my passion is hockey photography. I am the team photographer for both of my son’s teams, but just a very enthusiastic amateur. I need to up my game. I’m currently shooting with a decent lens (Sigma f2.8 70-200), with a Canon DSLR Rebel SL1. I’ve managed to get some great shots with the SL1, but that can require me to take 300-400 pictures per game to get 100-150 acceptable shots. I’m in the market for a new camera and I’m partial to Canon. Some of the articles I’m finding re: the newer mirrorless cameras suggest they aren’t great in low light. The camera store expert suggested a Canon EOS RP (and I’m looking at the EOS R), but he’s saying my zoom will decrease to closer to 200 mm when I switch to full frame. The more I read the more confused I get. Any advice would be much appreciated.
Hi Anita!
The camera store expert is correct when they talk about your zoom decreasing on a full frame camera. It can be a bit confusing so I’ll try to break it down.
Your current camera has a APS-C sensor with a crop factor of 1.6. (That’s just a complicated way to say that the sensor is smaller than the sensors using on a full frame camera.)
As a result, you need to multiply the focal length on your camera by 1.6 to get the equivalent focal length if you were using a full frame camera.
For example, full zoom on your lens is 200mm. Multiply by 1.6 means you are actually at 320mm on a full frame camera.
What’s the practical application of this? Well, simply put, on a full frame camera your lens won’t “zoom” as far. To try this out, if you zoom to 125mm on your current camera, that would be what 200mm looks like on your lens with a full frame camera.
Fortunately, a 70-200mm lens still gives you a lot of coverage at a rink. It’s one of the best options for crop sensors or full frame sensor cameras alike – so no need to go shopping for a new lens just yet!
As for mirrorless cameras, I don’t have a ton of experience with them yet at a hockey rink, so unfortunately I can’t give a personal recommendation.
I’ve heard really good things though about mirrorless – and the speed at which technology is increasing makes me want to move towards mirrorless sooner rather than later. My recommendation is usually to try renting the camera you have your eye on and test it out before committing to the full purchase.
Good luck!
Many thanks for the reply Frank! Great advice. The more I read about the loss of zoom (particularly for hockey), the more I think I should stick with a crop sensor. I just need a newer/faster version. I have my eyes on the Canon DOS M6 Mark II mirrorless. 32.5MP and up to 14 fps.
Thanks again and happy New Year!
Glad I could help! We talked primarily about the drawbacks of the crop sensor when it comes to reducing zoom, but I do feel the need to mention that the benefits are quite considerable as well.
Full frame sensors deliver significantly better quality, improved depth-of-field (bokeh), and (perhaps most importantly for hockey) better performance at high ISOs.
I haven’t used a cropped sensor camera for several years now but back when I did my images would be getting very grainy and the colours would be very lifeless at around ISO 1600. On a Full Frame I can go to 3200 or sometimes even higher while still getting results worth keeping. This gives a full frame photographer a lot of more to work with compared to a crop sensor photographer in the same lighting conditions.
Regardless of which option suits you best, the best path to improvement is to practice and practice and practice with the equipment you do have, rather than hoping a new camera or lens can miraculously solve all the challenges!
What camera would you recommend for Hockey Photography at the AAA/Junior B level (Highly competitive 16-18 year old age group). I am a beginner and fell in love with photography during an art class and want to do photography for my buddies AAA hockey team, and also a ton of other things. Wanted to ask for a camera for Christmas and saw some good deals on Canon EOS Rebel T7, and it comes in a bundle with a ton of stuff.
(Link To T7 Bundle: https://www.amazon.ca/Canon-T7-75-300mm-Telephoto-Accessory/dp/B07P158GZY/ref=sr_1_10?keywords=rebel+t7&qid=1639455149&sr=8-10)
Do you think that this would be good for shooting those kinds of games? Happy that the camera supports RAW photos, however I want those photos to be good quality to catch those high pace games…
Thanks.
Sorry, wrong link…
This is the right link: https://www.amazon.ca/Canon-EOS-2000D-18-55mm-3-5-5-6/dp/B08KSH2LQW/ref=sr_1_18?keywords=rebel+t7&qid=1639455404&sr=8-18
Hi Dimitri, thanks for the question!
Camera choice always depending on budget, of course. The Canon T7 should work well as a starter camera if paired with a wide aperture lens like the 50mm 1.8.
Your challenge with a camera like the T7 will be that rinks don’t have much light so you need to use high ISO settings to get a picture that isn’t blurry. High ISOs result in slightly duller colours and some noise/grain in the image.
Typically, more expensive cameras are expected to do a better job maintaining high image quality at high ISOs.
The biggest influencer here is sensor size. The Rebel T7 has a crop sensor, which simply means it’s a smaller sensor than the ones on a camera that a pro photographers might use.
To get significant difference in picture quality, you’d be looking for a full frame camera like the Canon 6D — but that camera is at a significantly different price point.
My general encouragement is to start with what you have! My first camera for shooting hockey was very comparable to the Rebel T7 and together with a 50mm 1.8 lens I feel like I still managed to get some great shots and learn a lot about hockey photography!
Hey, great description, I learned a lot.
I take pics of my son’s hockey games for the team, and bought the EOS Rebel T7, which does a relatively good job. You are right: I choose my sweet spots on the ice/arena and then the pics come out nicely. I use 1/1000, 5, 3200 ISO, which often does the trick.
I am forced to use the (good) kit lens 18-55. Do you know what lens I could buy (budget…) to improve the camera for Minor hockey (they play BB Bantam so quite fast but not NHL speed!)
Thanks for the kind words, Mikael!
If you want to squeeze every bit of light out of the area then you could probably afford to slow the shutter a couple notches as 1/1000 is quite fast for kids hockey, but freezing the action completely like that is also a stylistic choice so your call entirely!
For a lens, it’s tricky because prices start going up pretty quickly when looking at zoom lenses with wide apertures.
On a really tight budget the 50mm 1.8 or 85mm 1.8 could be intrigued choices. Having no zoom is certainly a challenge so it’d definitely be about waiting for the play to come to a specific point on the ice. It also depends if this sort of lens blends with the other types of photography you do away from the ice.
Beyond that, your best bet might be to save up for a 70-200mm 2.8 or see if an older model of that same lens is available on the used market. With a bit of luck you might be able to find a perfectly capable lens with some big savings.
You could also consider renting a lens for one game before committing to a purchase, just to see if you like the experience and if it delivers the results you are expecting.
Good luck!
Tonight I shot an ice hockey game. While I have done night outdoor lacrosse games and have had success, I am not at all happy with the images I got tonight. I have a Canon 7D MKii and I used a Canon 70-200mm EF 2.8 L
I was positioned on the bench with no glass to shoot through, so I expected my images to be so much clearer than they are. I understand ISO and shutter speed plays a part in the image quality and how grainy they will be. My images came out grainy, unless I was zoomed all the way in at 200mm and most of the images are just not sharp. Any suggestions on how to improve this? Also, would shooting through glass (clean) be better, to zoom in and be eye level with the play? I’m hoping to improve this skill so that I can consider shooting indoor sports as a job some day.
Hi Christine!
Sounds like there are two different possible issues at play:
If the pictures are grainy, that is a result of a high ISO which may be necessary based on the lighting conditions in the arena. But the only way you can lower the ISO is if you slow down the shutter speed (which may make the pictures blurry) or if you widen up the aperture, which leads to the second possible issue: focus.
If the images are not sharp then it’s either because the shutter speed is too slow (anything slower than 1/500 will likely come out with some blur) or because the focus missed.
Focus is the hardest part because everyone is moving so fast. Since you’ve done sports before, you’ll be familiar with tracking a fast moving event, but with less lighting in a rink the camera can struggle even more to lock focus.
If you haven’t already seen it, I’d recommend checking out my article about focus: https://frankmyrland.com/hockey-photography-guide-focus/
You definitely will want to read more about the different focus tracking modes and maybe even play with the in-camera settings on tracking speed.
As for the location, if it’s ever possible to shoot clean instead of through the glass, I’d take it. Glass steals away contrast and can also distort your image.
And, as always, practice makes perfect! Just like lacrosse, hockey has its own little quirks that take some time to get used to.
Good luck!
Hi Frank, great write up.
I have the Canon R5, RF50 1.2 & the RF800. Neither lens will work great for hockey. One not having enough reach, the other having too much reach and being a F11, well, just no.
I really want to grab the RF 100-500 f4.5-7.1 L IS USM. A friends hockey team offered to start paying me to photograph their games. Would the f4.5 suit the needs? Everything I’ve read says the R5 handles ISO with ease but I’ve never shot an indoor hockey event. I have a feeling you’ll say maybe go with the RF 70-200 f2.8 which is at the same $2700 price point. But I won’t get as much use from it overall (wildlife etc)
Your thoughts?
That’s an interesting question. Certainly I would say the 70-200 if hockey is priority, but you have the right idea about thinking of how you might use the lens for other situations.
Regarding whether 4.5 is enough, it depends on your tolerance to what a high ISO does to a picture. Yes, you’d certainly be giving up picture quality with the 100-500 — some of which you could maybe scrape back in post production but not all.
If you have the opportunity, before committing to a lens would you be able to take some pics in an arena at f4.5 with an acceptable shutter speed for motion and see how it looks?
As a personal philosophy, I also support buying the 70-200 because limitations teach the art of patience. I’ve seen many an eager sports photographer taking pictures every 2 seconds, even with the play on the opposite side of the field, arena, etc. It’s rare those images turn out.
I’ve found more success in waiting for a play to develop into specific areas of the ice that are “sweet spots” based on my lens. And once a play develops through that area, a quick burst gets more useful photos than zooming all over the ice “chasing the play” ever could.
Ultimately, every photographer has different needs for different lenses! While I would confidently say the 70-200 is the best choice for hockey, you will have to balance your personal needs and tolerances as well. Best of luck to you!
Hey Frank, thank you for your work, it’s super useful and interesting to read. I ve red many good reviews about Nikon D3s. Is it worth to buy so old camera for a beginner in your opinion?
I can’t say that I have direct experience with that camera or much of the Nikon lineup. It’s a full frame camera, so you can expect great quality and solid performance, even in low light, despite being an older model.
Where you are likely to miss out with an older camera for action pictures is on the auto focus — technology moves pretty fast so each generation of camera really seems to improve on focus tracking.
With that said, I think getting action shots is as much about the photographer as it is the camera, so I think that with some practice and patience the Nikon D3s would help you get some shots you can be proud of!
Thank you very much, Frank! I really appreciate what you do for beginner enthusiasts!
Hi Frank, thanks for the nice summary. What I am struggling with is the position to take the photos: Around the field you typically have glas walls which are dirty or damaged. Taking pictures through these walls results in flares and reflections. From the tribune I just get a view from high above. It requires more tele and most of the time you do not see the faces of the players because they look rather downwards than up into the camera. In Addition, behind the goals you have protective nets above the glas walls preventing injured spectators but also making this interesting perspective impossible for photography. What is your recommendation from where to shoot? Thanks, Stefan
Thanks for the question! My favourite place to shoot from is the corners — just like you mentioned this is the best place to be able to see faces. Unfortunately, the quality of the glass and the puck marks do vary quite a bit from arena to arena. If they haven’t replaced the glass for a while, you just might not have the option.
If I’m in an arena with glass that has lots of marks, I’ll still try to find a little spot that is clear. All you need is enough space for your lens to shoot through.
In the NHL they have the luxury of being able to remove a small covering and shoot through the glass. But if you don’t have that luxury, you simply have to manage with what you can.
If you do have to shoot through foggy or low quality glass, you can bring a lot more life back into your pictures by adding contrast, lowering “blacks” or adding “dehaze” (Adobe Lightroom feature). Glass removes a lot of contrast from an image, so adding that punch back into the picture helps a lot.
Thanks Frank for the rapid answer. At least good to get your confirmation that we have to live with these constraints 🙂
Just a beginner photographer and was rolling through the choices of cameras/ lens. My boy plays hockey and I would like to work on capturing some great photos. My budget is pretty good. 5-6 k.
I’ve always felt you get what u pay for any suggestions on cameras and lens for a beginner. I just don’t want to buy something now and have to upgrade next year.
Nice, that’s a pretty good budget to work with!
Regardless of which brand you go with (Canon, Nikon, Sony, etc.), I would recommend getting a full frame camera. This means the camera sensor size is larger, which is much better for getting great shots in low light conditions. Canon full-frame starts with the 6D and Nikon starts with the D750.
The first lens you would want to get for hockey-specific photos would be the 70-200 f2.8. All brand makes this lens or a close variant of it. This gives you a wide aperture (important for making the most of limited light) and enough zoom range to cover some ground.
If you want to invest a bit more, you could also take a look at the 24-70 2.8. Again, all brands will make a lens like this or a close variant. Adding this would push you over your budget, but this would give you a wider angle lens and an option for if you wanted shots after the game on the bench or something.
An alternative to the 24-70 would be something like a 17-40 f4 or even a prime (non-zoom) lens like the 50mm 1.4, which is a great portrait lens.
Lots of options, but a full-frame camera and a 70-200 is the best place to start!
This helps a lot. Thank you