
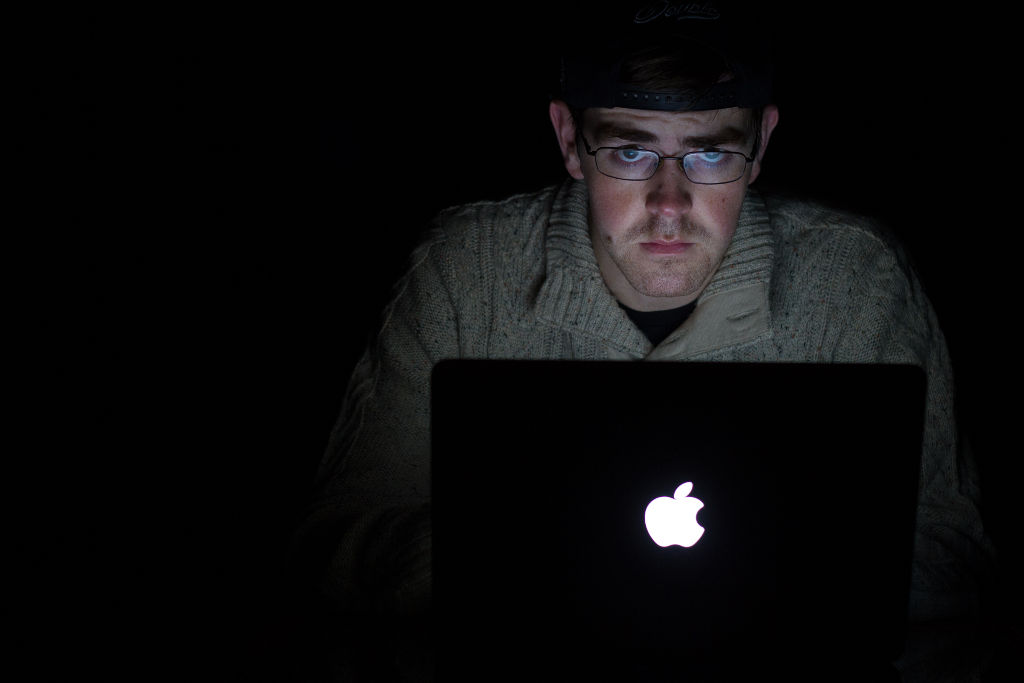
Using a Laptop as a Key Light for a Self Portrait
In the endless pursuit of soft light sources to use for our next portrait, you might be ignoring a fun little option that is right underneath your nose.
No, I’m not talking about your moustache. This post is about using a laptop to light your portrait photos.
Finding the Light
This is a shot I’ve wanted to do for a while but haven’t. My excuse for not doing it earlier is because it’s such a remarkably simple shot. For the record, this is a terrible excuse, but I think it’s valid.
Repurposing things to use them as a light source is an activity that is much more fun than it sounds. Open Microsoft Word and you have a large, clean, fairly soft light source. Simply flip off the rest of the lights in the room and your low key portrait is ready to go.
To have the background fall off into darkness (like in the example), you’ll need to make sure there is a bit of distance to objects or the wall behind the subject.
The quality of your camera really doesn’t matter much here. What matters more is a steady tripod. For these pictures, I shot at 1/15, f2,8, ISO 400 with the 50mm 1.8.
If you are shooting in RAW and have a grey card, make sure to fire off a shot while holding it in front of your face. This way you can take the reading off the grey card to correct the white balance on your pictures.
Dealing with glasses
If you are photographing someone who has glasses, this means two things:
- Their eyes suck. Clearly they got the short straw in the genetic lottery. They should express their thankfulness on a daily basis that we have options like glasses and laser eye surgery in this modern era because if they existed in the early days of humanity, having poor eyesight would no doubt mean their early death; and
- Even more horrifying than #1, it’s going to be slightly more difficult to take this picture without having the light reflect off the glasses. You may need to experiment with different head tilts to find a pose where the light from the screen isn’t reflecting right back into the camera.
Before and After
Here’s the before picture:
It’s definitely a bit under-exposed. There was a wall pretty close behind me and I wanted to make sure I didn’t light that up and kill my background. The colours that came off the camera’s automatic white balance were also much bluer than in real life.
These issues are fixed quickly enough, since we shot in RAW. I also boosted clarity on my sweater to make the texture jump out a bit.
You may need to use adjustment brushes to clean up the exposure here and there. In this case, my face was lit a bit too much by the screen, so a quick swipe with an adjustment brush balanced it to the rest of the picture nicely.
After 3 minutes of editing and a quick adjustment to the crop, we have this as our final shot:

If you want to get more fancy, you could certainly drop a flash behind your subject and get a nice rim light and separate them from the background.
So there you have it. If you find yourself short on fancy photography lighting equipment, pull out your laptop and voila! A wonderful portrait that you can use as your desktop background if you’re into that meta wallpaper sort of thing.

About the Author
Hi, my name is Frank Myrland and I’m a photographer based near Orangeville, Ontario. While I am active in most types of photography, I mostly enjoy sports, events, family and commercial photography.
I like to learn by doing — and also to share my own experiences for the benefit of others, whether they are just getting into photography or if they are well on their way to mastering their style and craft.
Feel free to reach out to me if you have any questions at all at [email protected]
The latest posts from the Photography Blog

Preparing for Your Family Photography Shoot: 6 Important Things to Consider
Preparing for Your Family Photography Shoot: 6 Important Things to Consider Planning a family photoshoot? This short guide will give a list of what to consider in advance to make sure to get the most out of the time and have confidence you’ll get some great pictures!…
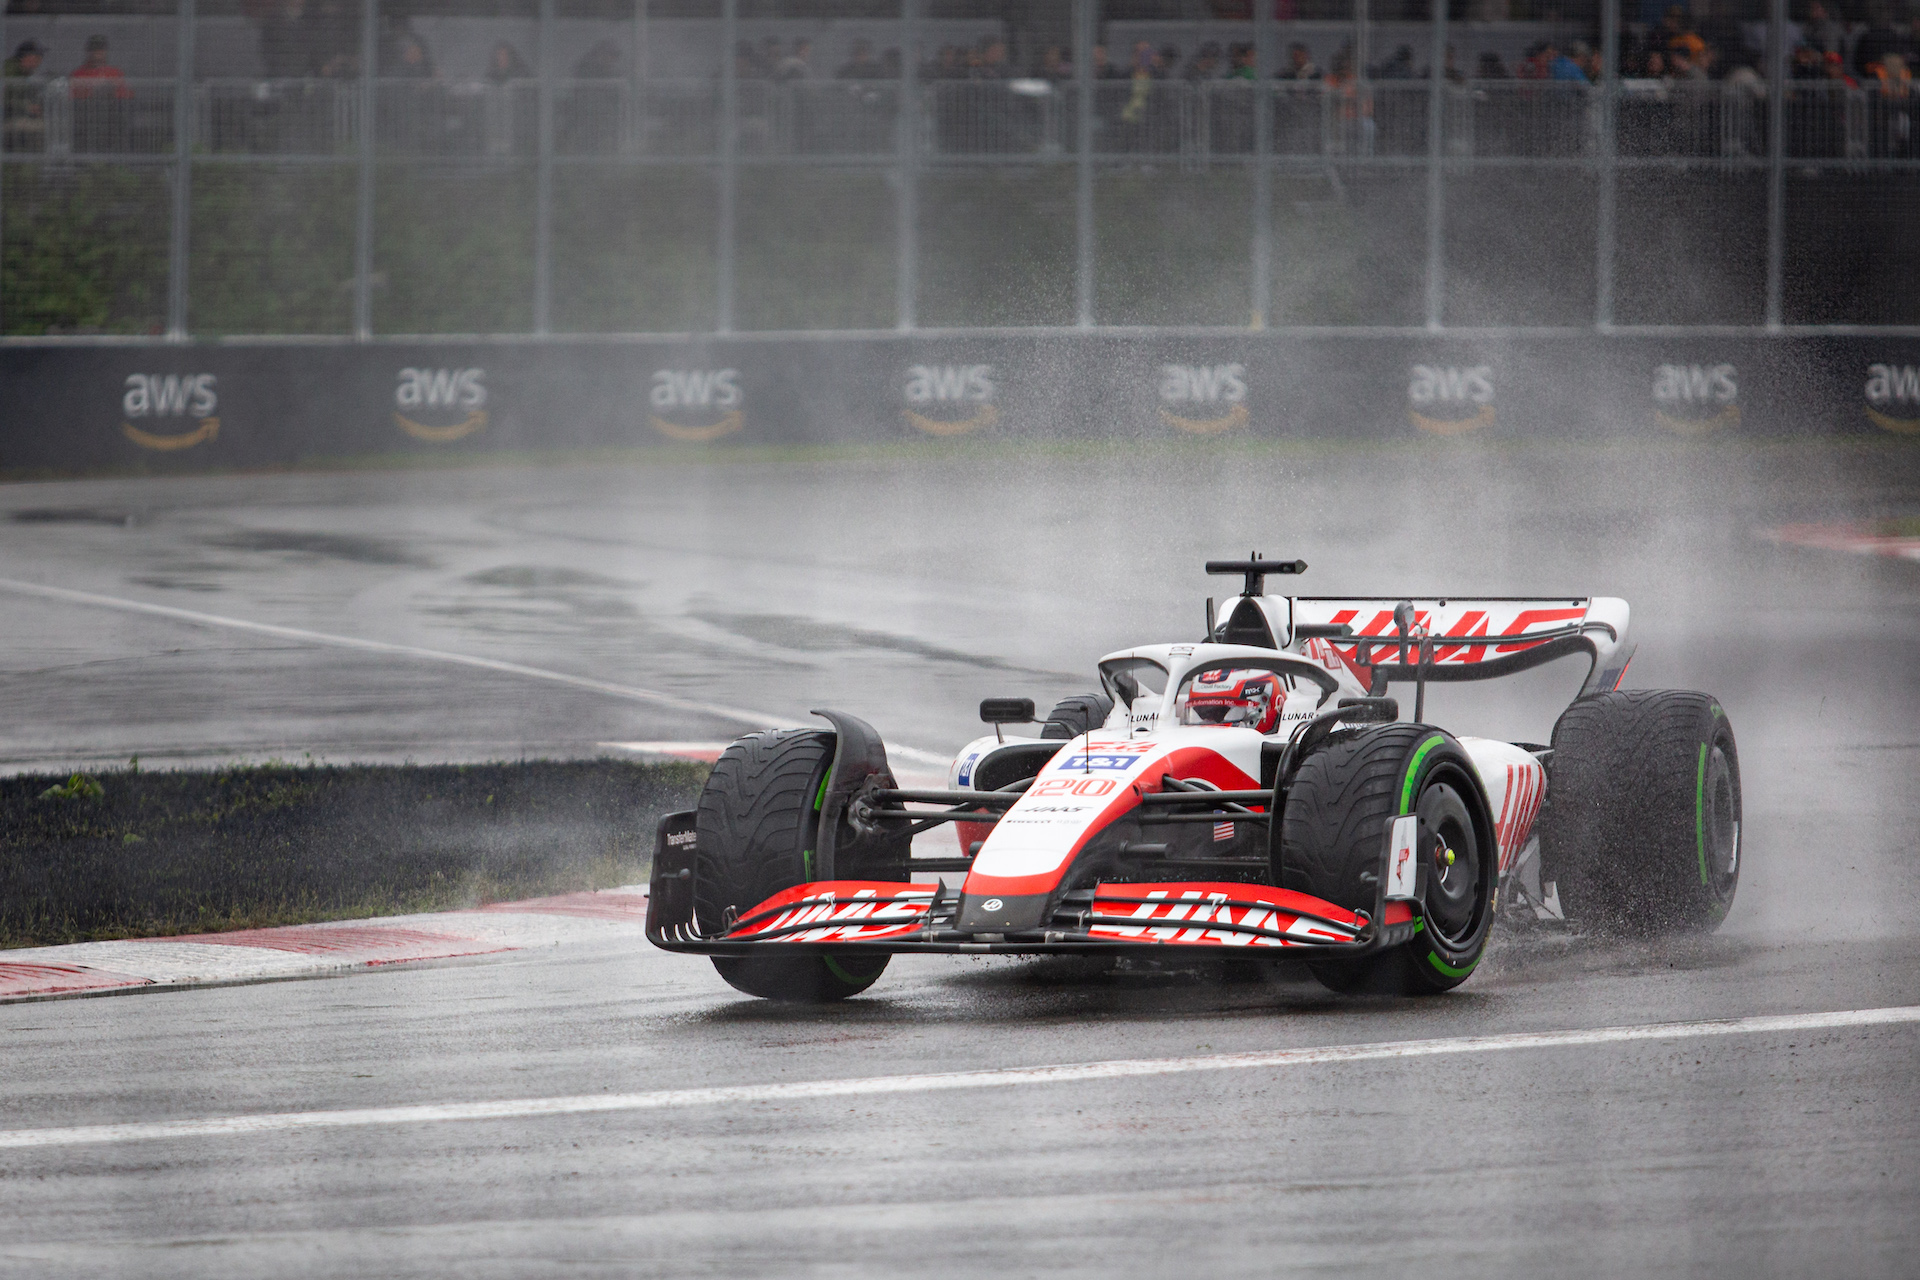
How to Take Photos from the Grandstands of the Canadian Formula One Grand Prix in Montreal
How to Take Photos from the Grandstands of the Canadian Formula One Grand Prix in Montreal While all sports are challenging to photograph in their own way, Formula One is an especially difficult event to capture for the casual photographer. This guide is a summary of…

The Top 5 Reasons to Book a Corporate Headshot Photoshoot for Yourself or Your Team
The Top 5 Reasons to Book a Corporate Headshot Photoshoot for Yourself or Your Team A professional, current headshot is a must in today’s digital-first society. For many lines of work, the difference between a good or a not-so-good headshot might be the dealbreaker in…
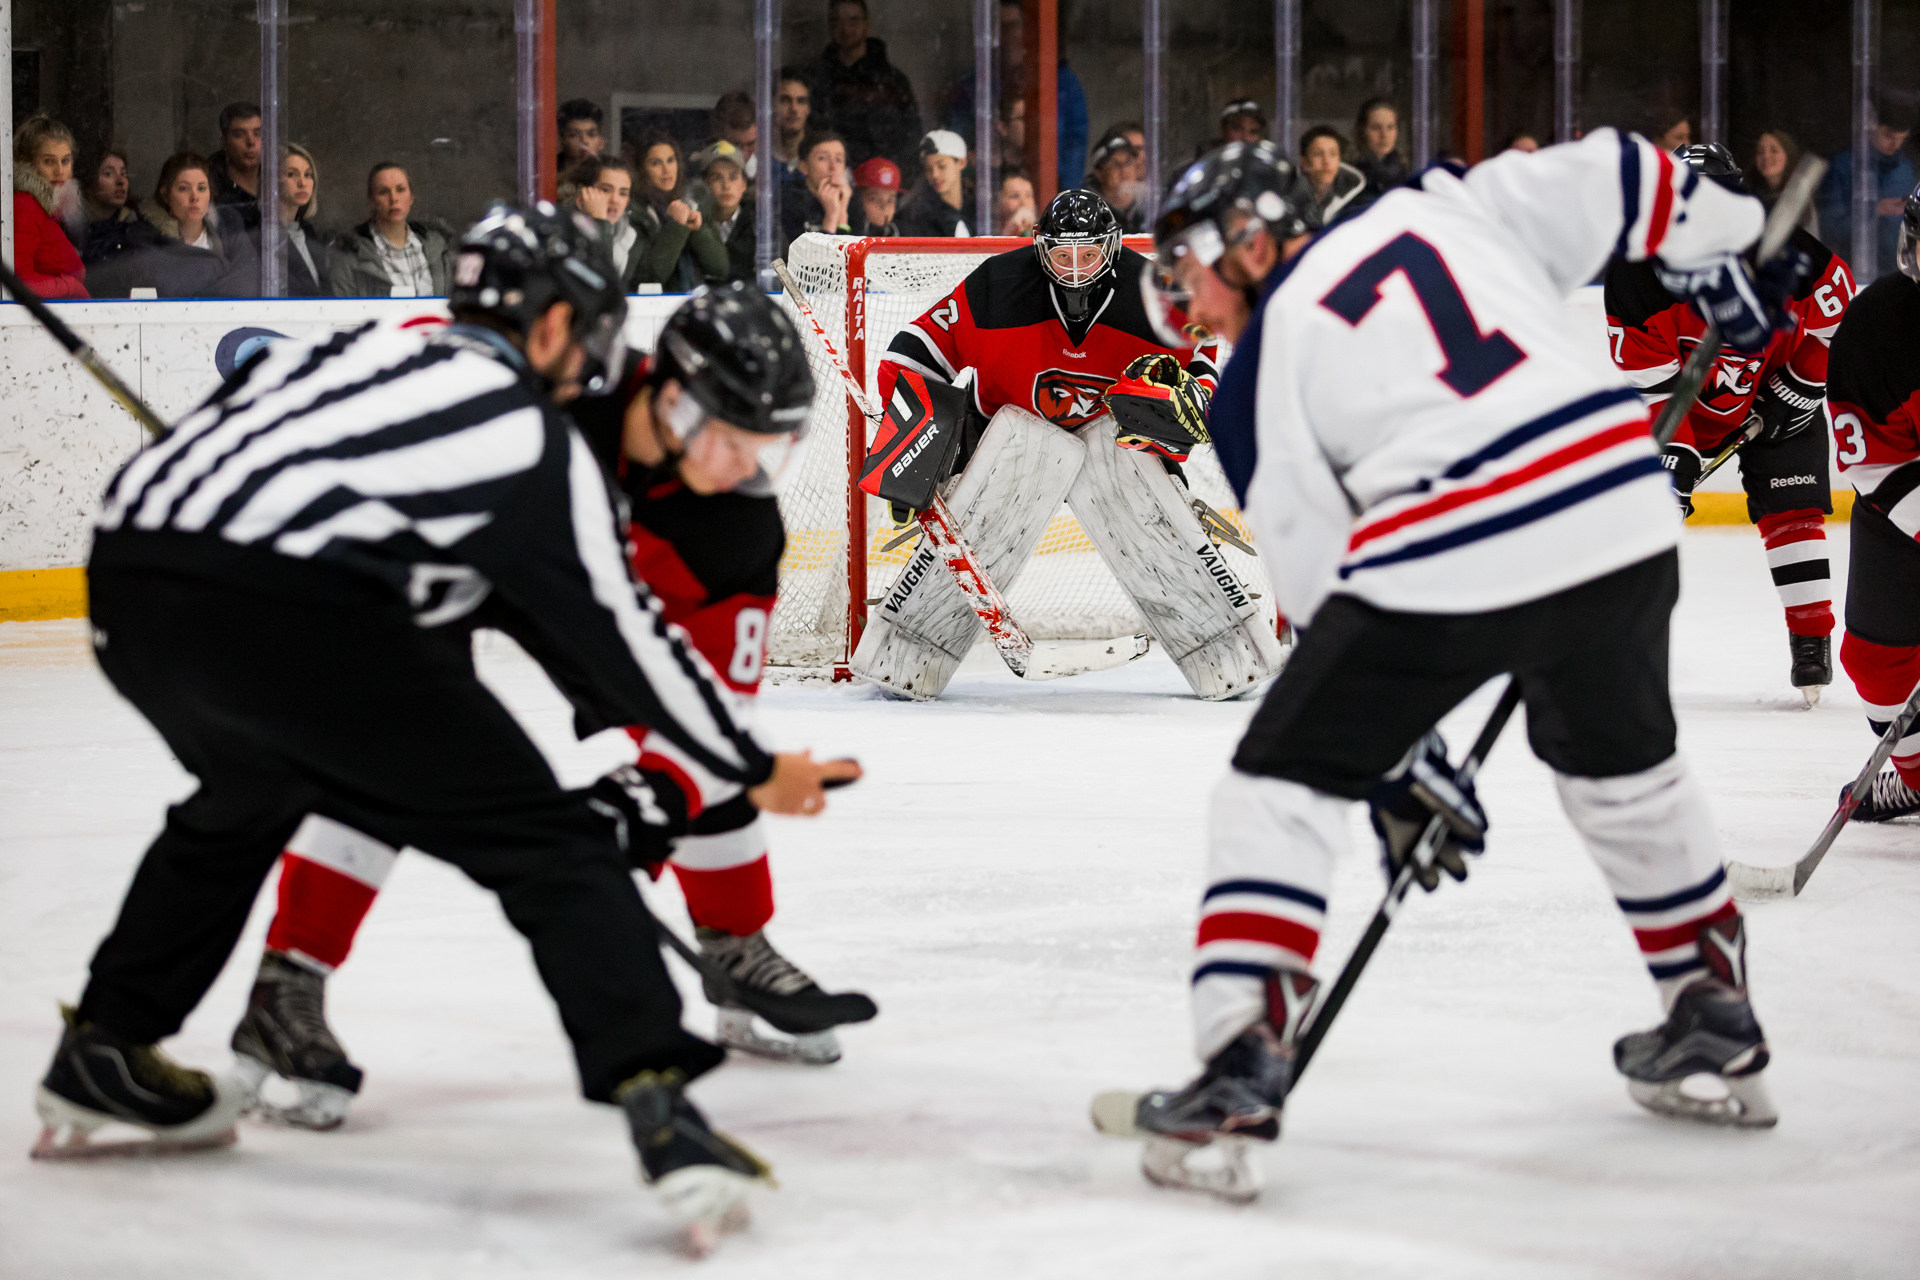
What are the best camera settings for hockey photography?
Have you ever tried to shoot hockey with your camera set to “Auto” or “Sport” and been disappointed with the results?
Cameras are getting smarter every day — but they still struggle with the challenges that come with photographing hockey.
The good news is that you can learn to set up your camera in manual mode and make the most of your time at rink.

What are the benefits of commercial photography for your small business?
What are the benefits of commercial photography for your small business? How do you quickly grab a potential customer’s attention? People don’t read anymore and there are a million different distractions competing for interest, so anything mundane or expected isn’t…

What is the Best Lens for Ice Hockey Photography?
Welcome to the world of hockey photography! You’re up against low light and fast action. Without a little bit of planning, it’s the perfect recipe for blurry pictures.
You ready for a challenge?
I’m going to compile a list of some excellent lenses that you should think about getting if you want to take your hockey photography to the next level.